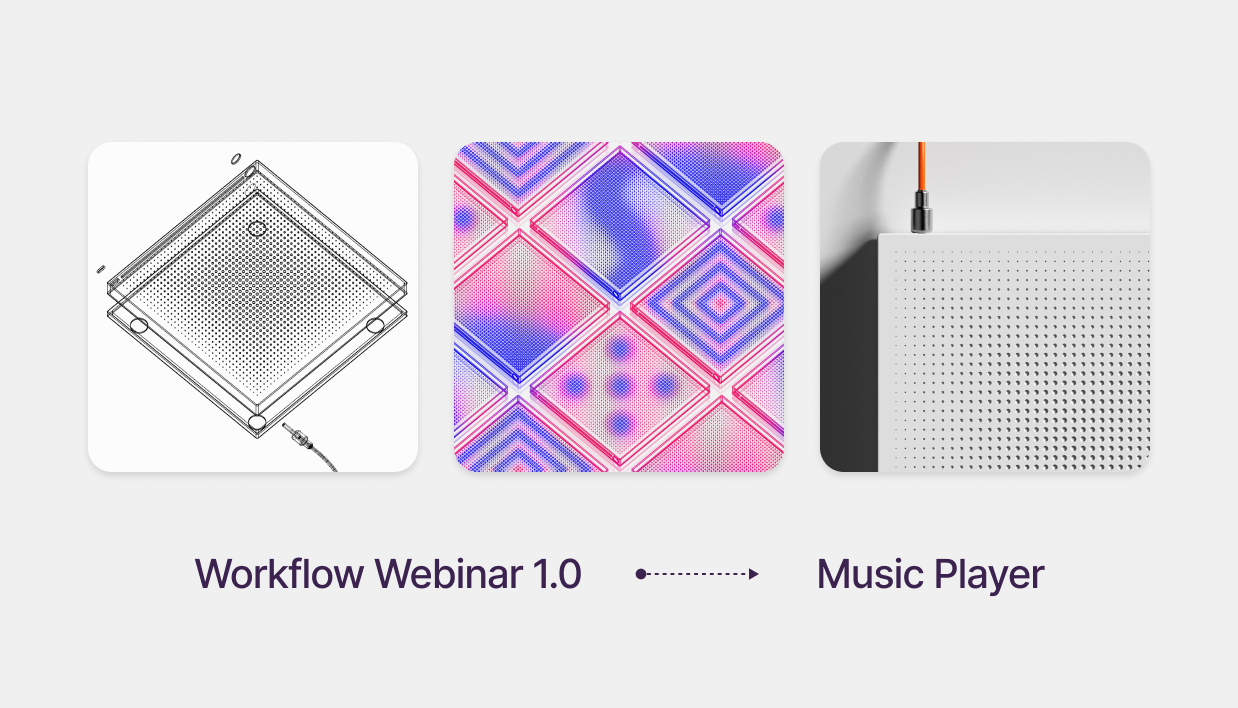
Rhinoceros - Grasshopper - Keyshot | Workflow 1

Download Files: cademy.xyz/webinar
In this Workflow Webinar, we'll design a DVD player, exploring CAD modeling, parametric design, and rendering techniques. You can watch the full webinar via the link at the end of this post!
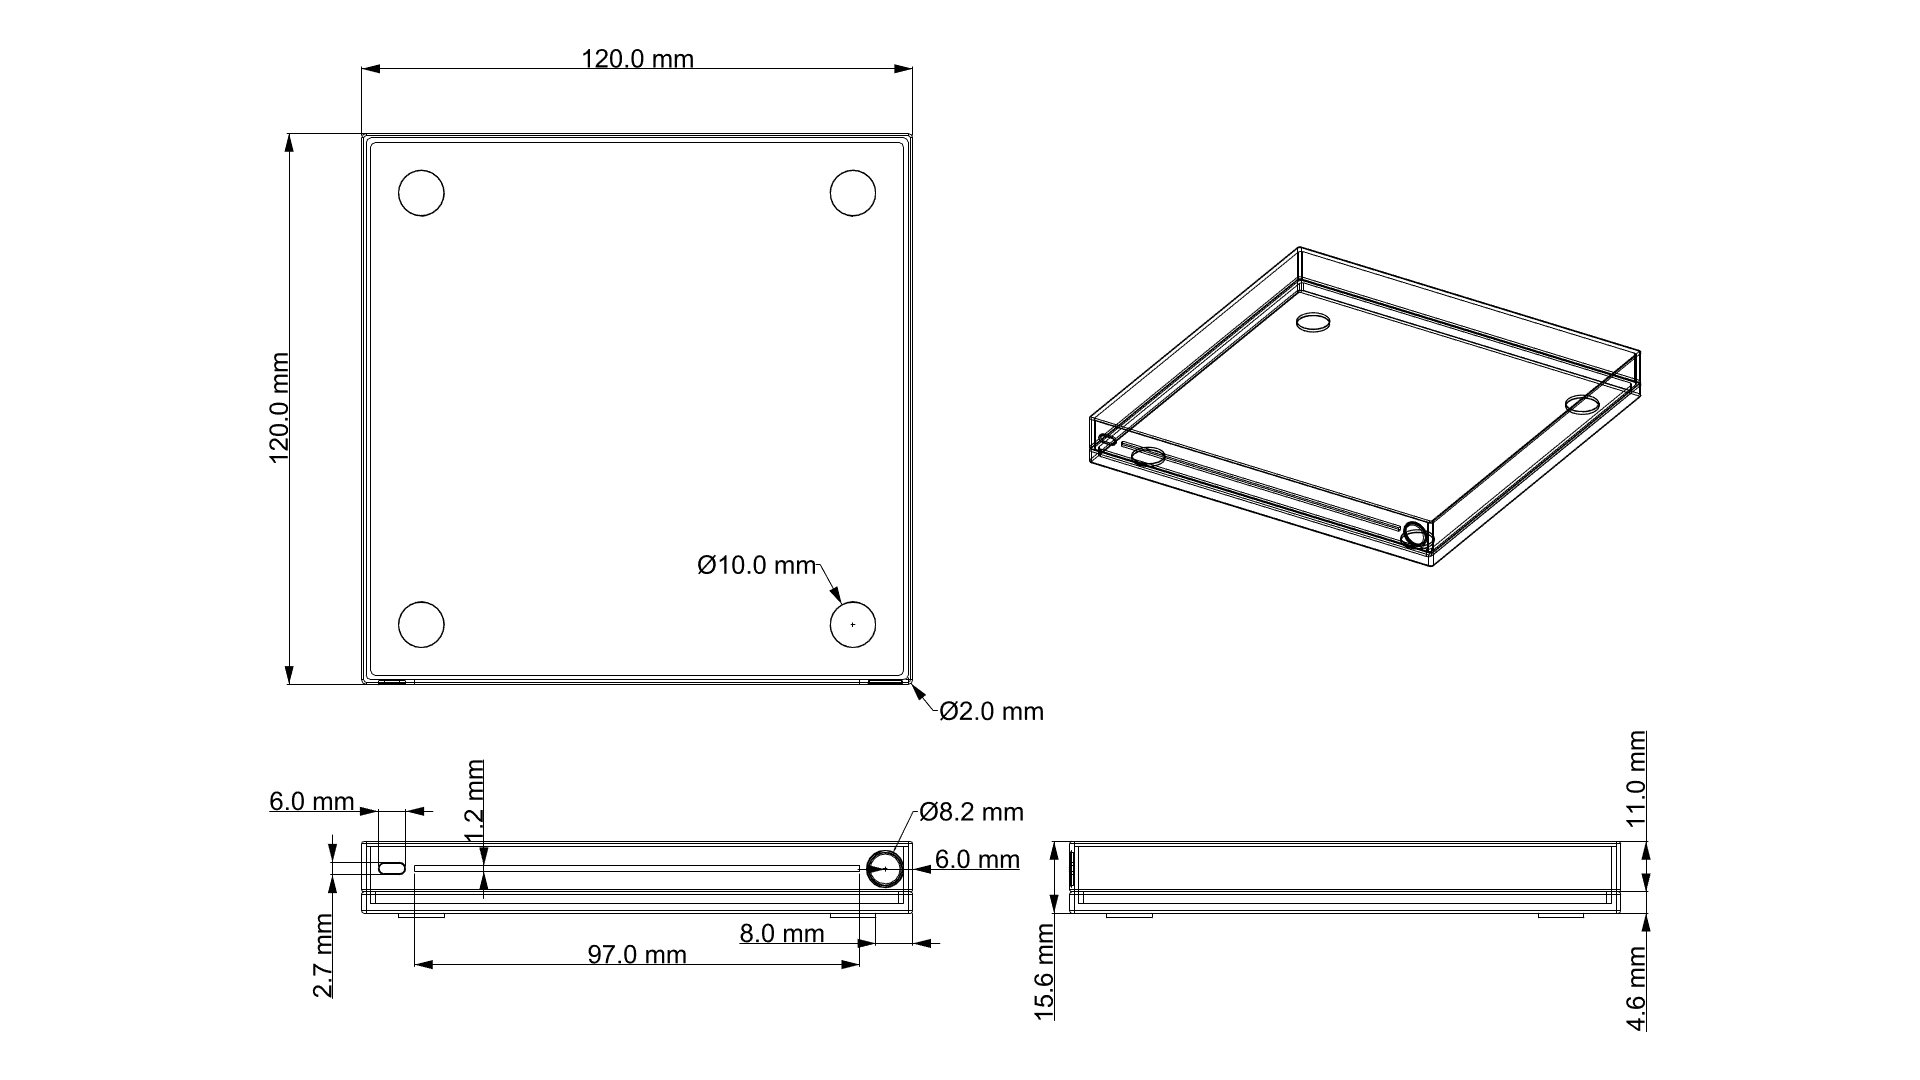
Step 1: Modeling in Rhinoceros 3D
We begin by creating the base geometry using precise technical dimensions in Rhinoceros 3D:
1. Use rectangular extrusions to shape the body
2. Apply shell operations to create hollow parts
3. Use Boolean operations to refine details
4. Create cables with the Pipe command using Degree 3 (or higher) NURBS curves
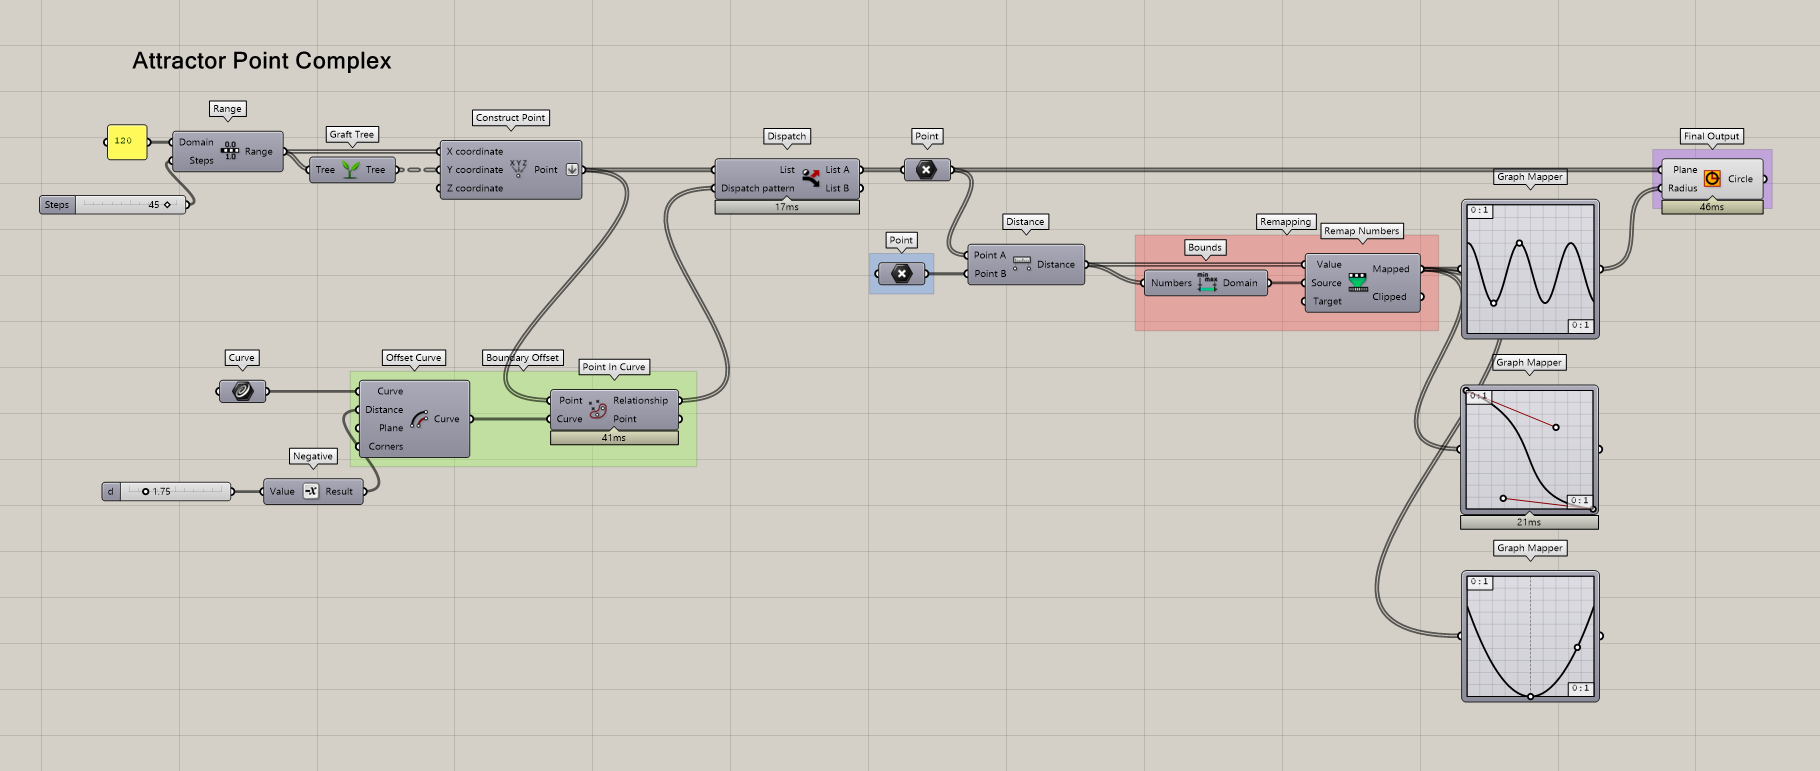
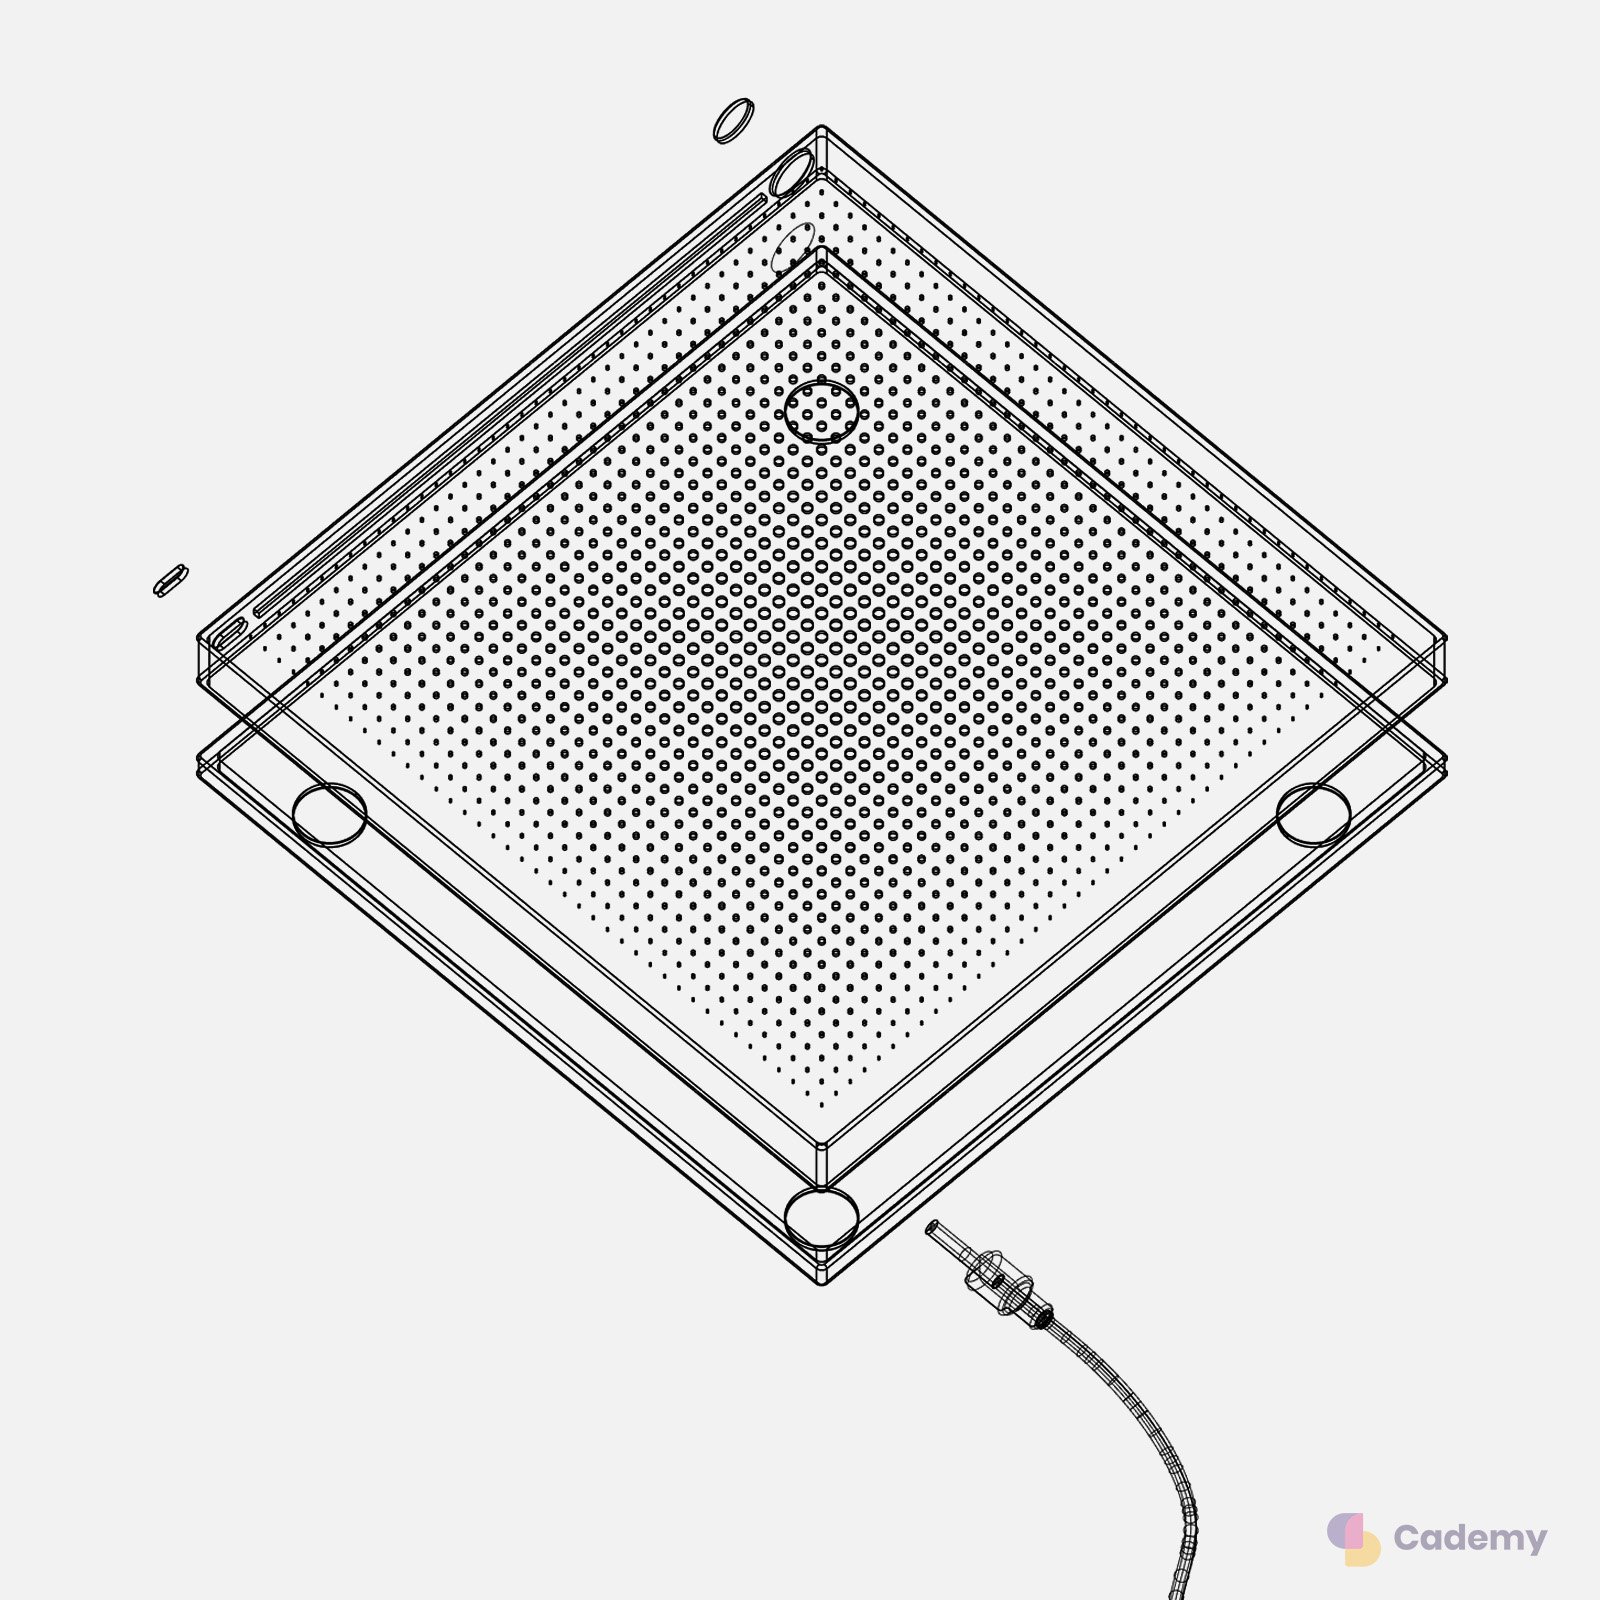
Step 2: Applying Parametric Texture in Grasshopper
Grasshopper is a visual programming plugin in Rhinoceros 3D that allows us to create algorithmic and parametric designs without coding.
To generate the pattern on the DVD player's top shell, follow these steps:
5. Create a grid of points/planes with the rectangular surface dimensions
6. Offset the border and cull points near the edges
7. Use an attractor point to control the radius of the circles
8. Remap values to set a min-max radius
9. Use Graph Mapper for non-linear variations
After generating the pattern, perform a Boolean Difference to engrave the texture onto the top shell. Be careful as this operation will take a lot of time to calculate., so you may want to process it in small batches.
💡 Experiment with different Graph Mapper settings to explore unique design variations!
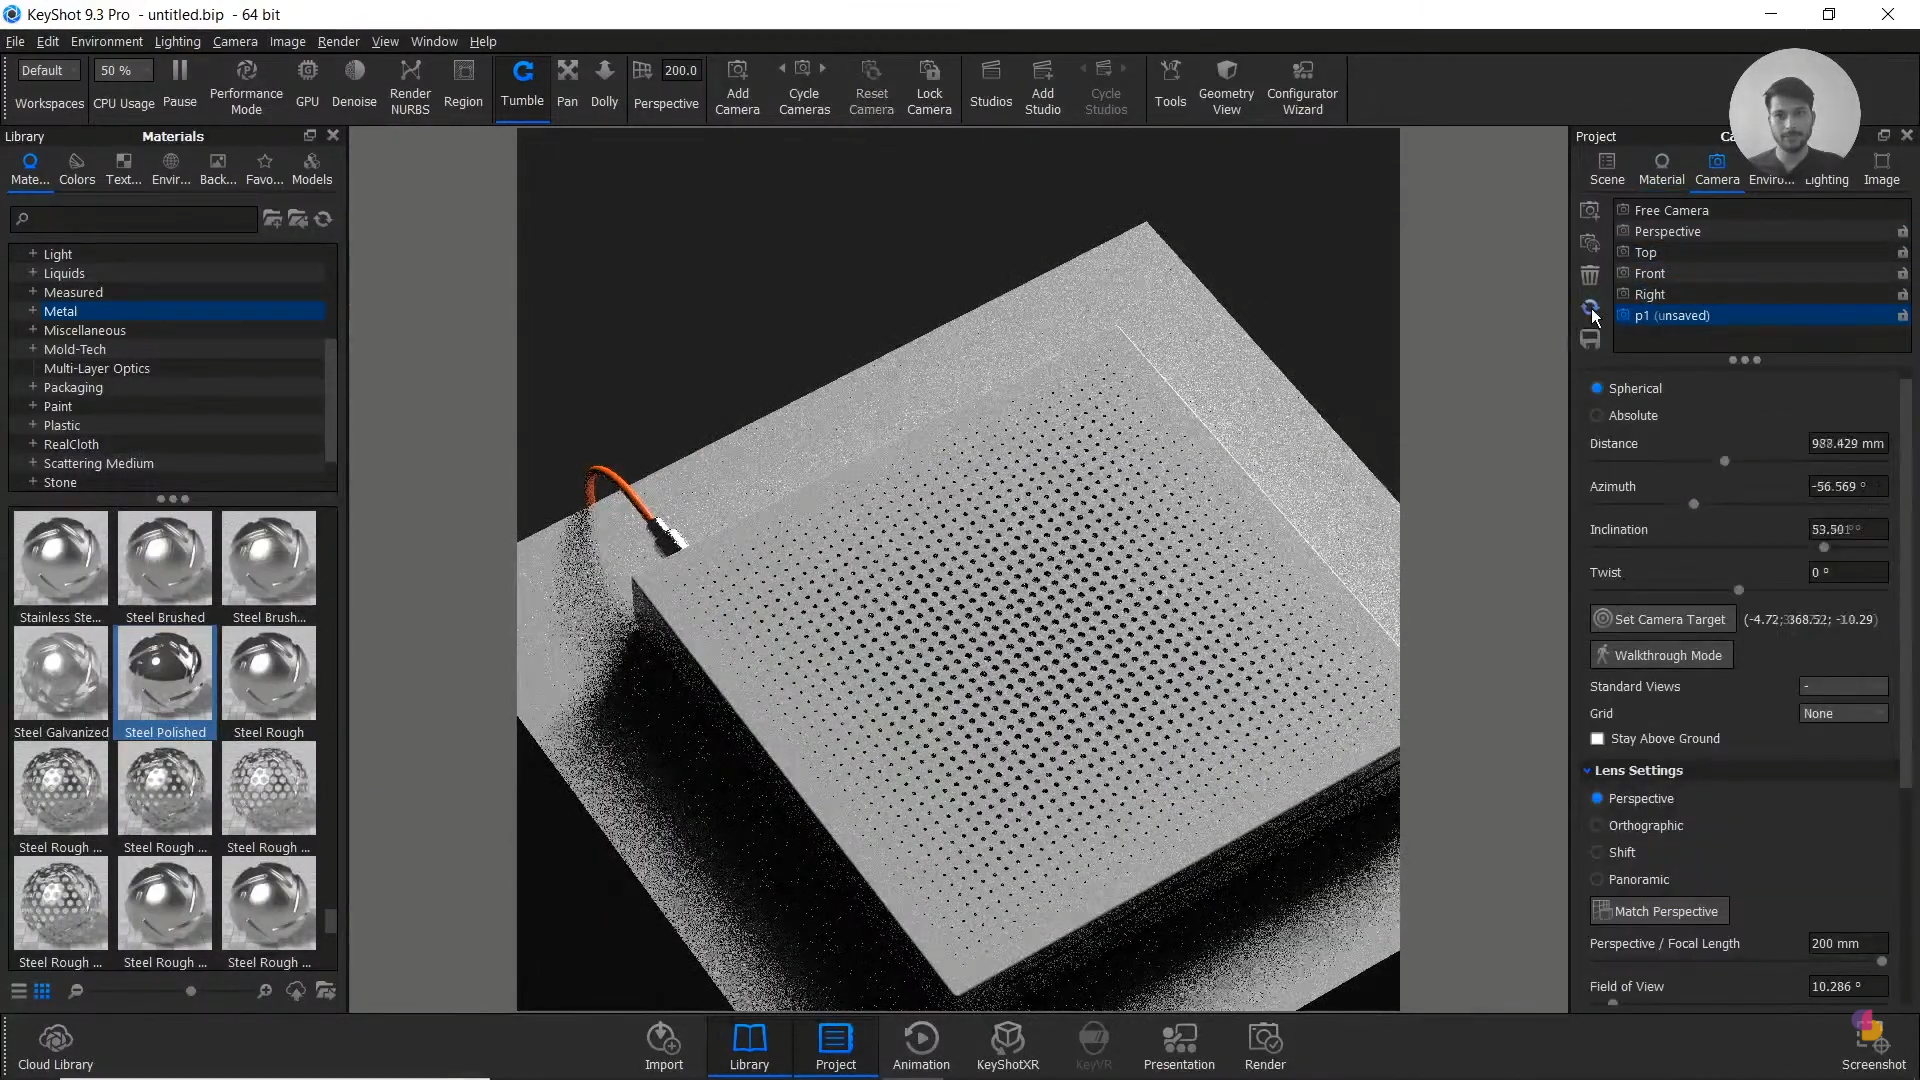
Step 3: Rendering in Keyshot
Once we have the final 3D model with textures, we bring it into Keyshot for rendering:
10. Import the .3dm file (Rhinoceros native format)
11. Use Keyshot’s material library to apply high-quality materials
12. Set up a 3-point light environment using the HDRI Editor
13. Hit Render!
Thanks for reading ❤️
Don’t miss out, enroll today.