
Bottle Surface Design in Rhino 3D: Step-by-Step Tutorial

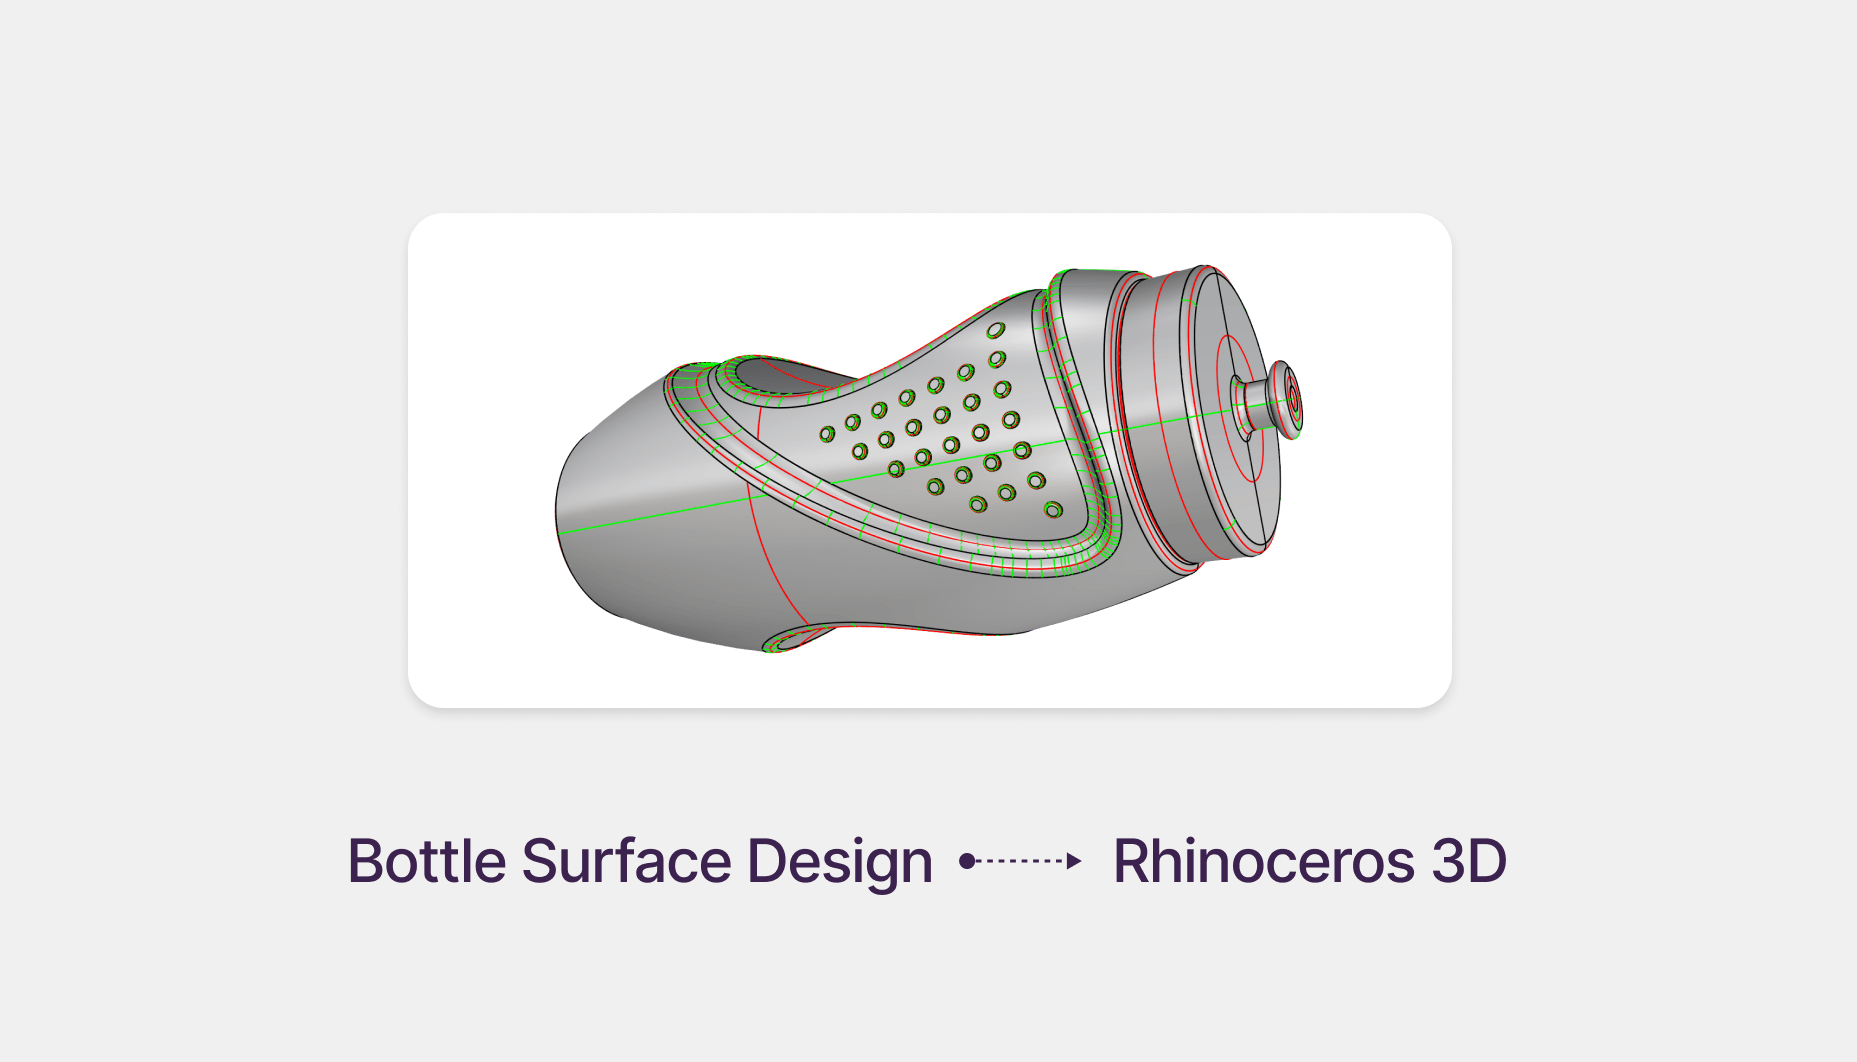
Surface Design in Rhino 3D: A Step-by-Step Bottle Tutorial
I came across a bottle design tutorial on YouTube that was built for SolidWorks and similar solid modelers. Since there wasn't a dedicated version for surface modeling, I adapted the concept into a tutorial for Rhino 3D users.
Download File
You can download the reference file to follow along. It includes the complete step-by-step construction model.
Designing complex surface features in Rhino 3D requires a structured workflow, especially compared to other CAD packagaes like SolidWorks. This guide breaks down the complete construction process of a bottle design, from initial 2D sketches to final cap tolerance adjustments.
Step 1: Base Revolve and Lateral Cutouts
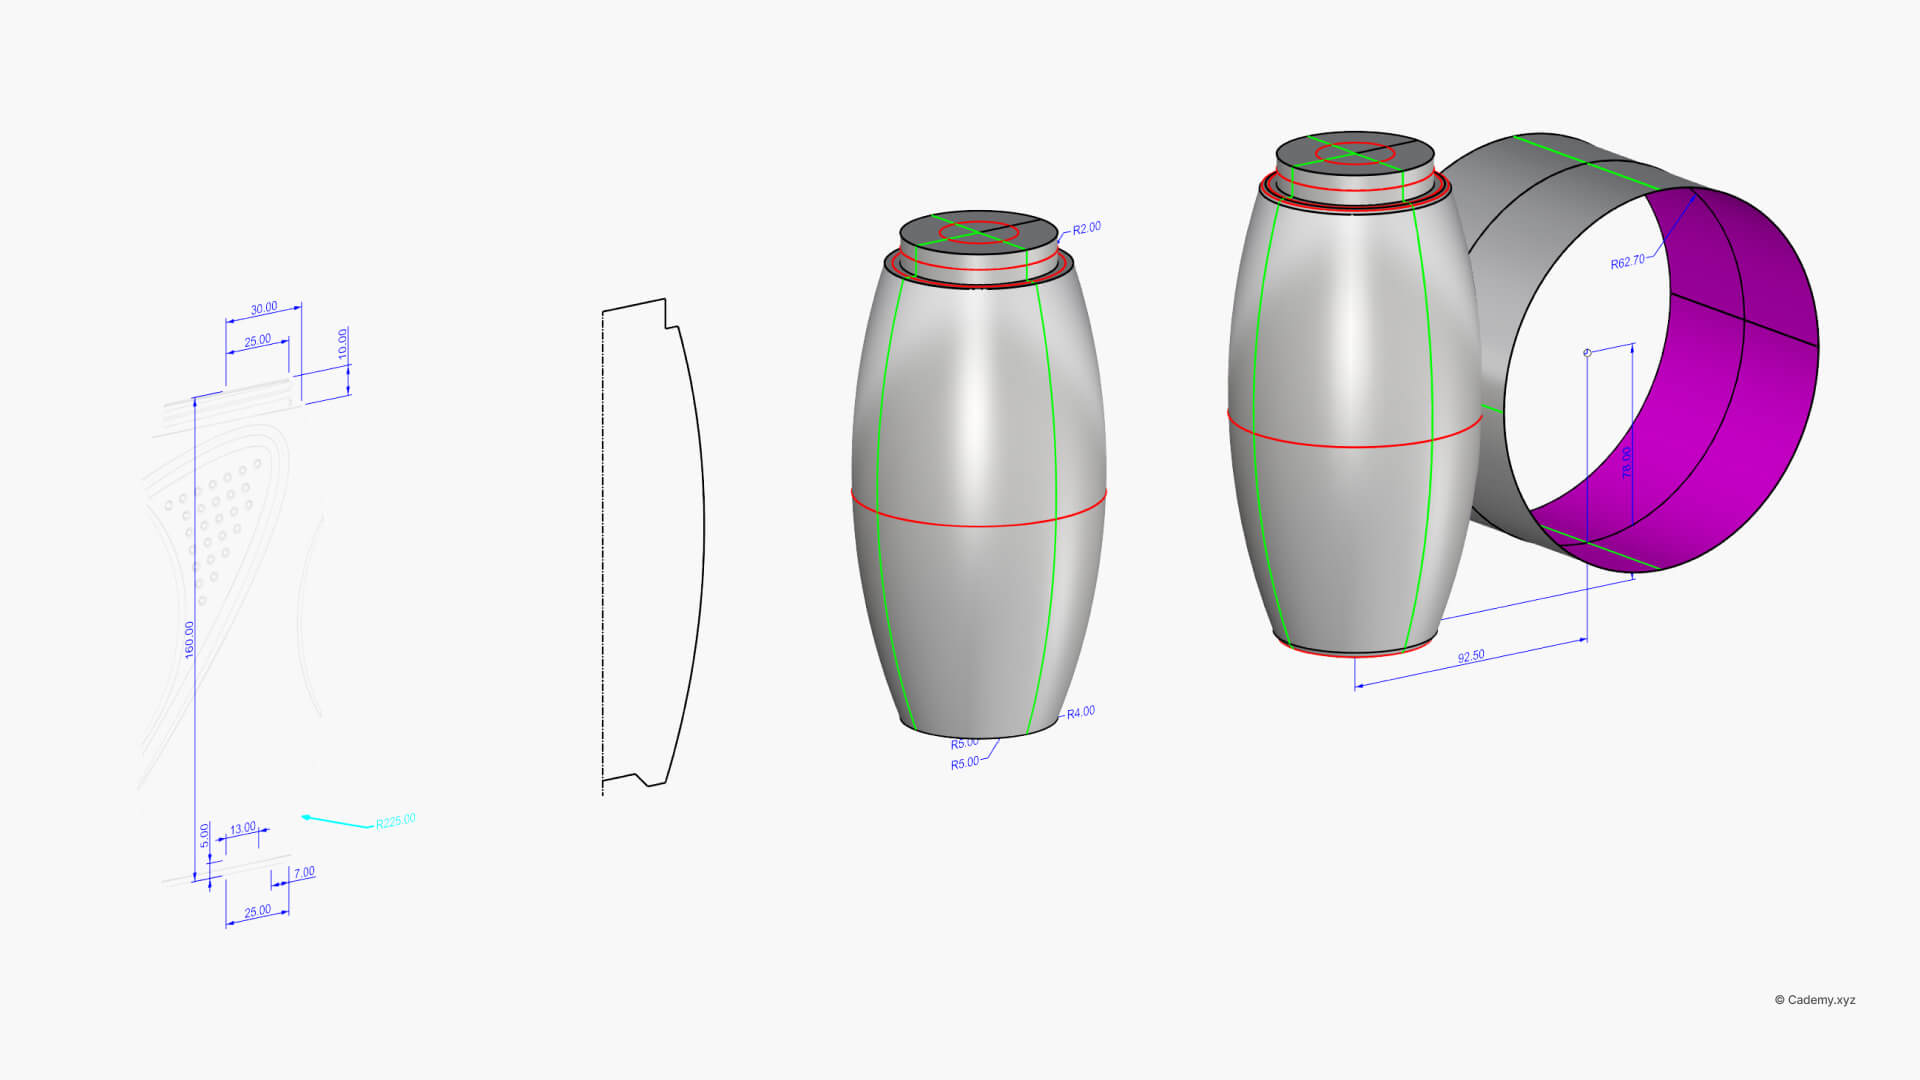
Start by drafting the primary 2D profile curve of the bottle along the central axis.
- Run the
Revolvecommand on the 2D curve around the center axis to create the main solid body. - Draw a circular profile on the side plane representing the lateral cutout.
- Extrude the circular profile through the bottle body.
- Use
BooleanDifference(orTrimif working with surfaces) to remove the lateral material from the main body.
Step 2: Recessed Grip Surface Setup

To create a functional grip zone, you need an inner offset surface to serve as the recessed boundary.
- Offset the main vertical revolve curve inward to establish the depth of the grip area.
- Run
Revolveon this new inner curve. - Draw the 2D profile shape of the grip boundary in your side view.
- Use
Trimwith the 2D shape to cut out the unwanted regions of the inner revolved surface.
Step 3: Blend the Grip Transitions
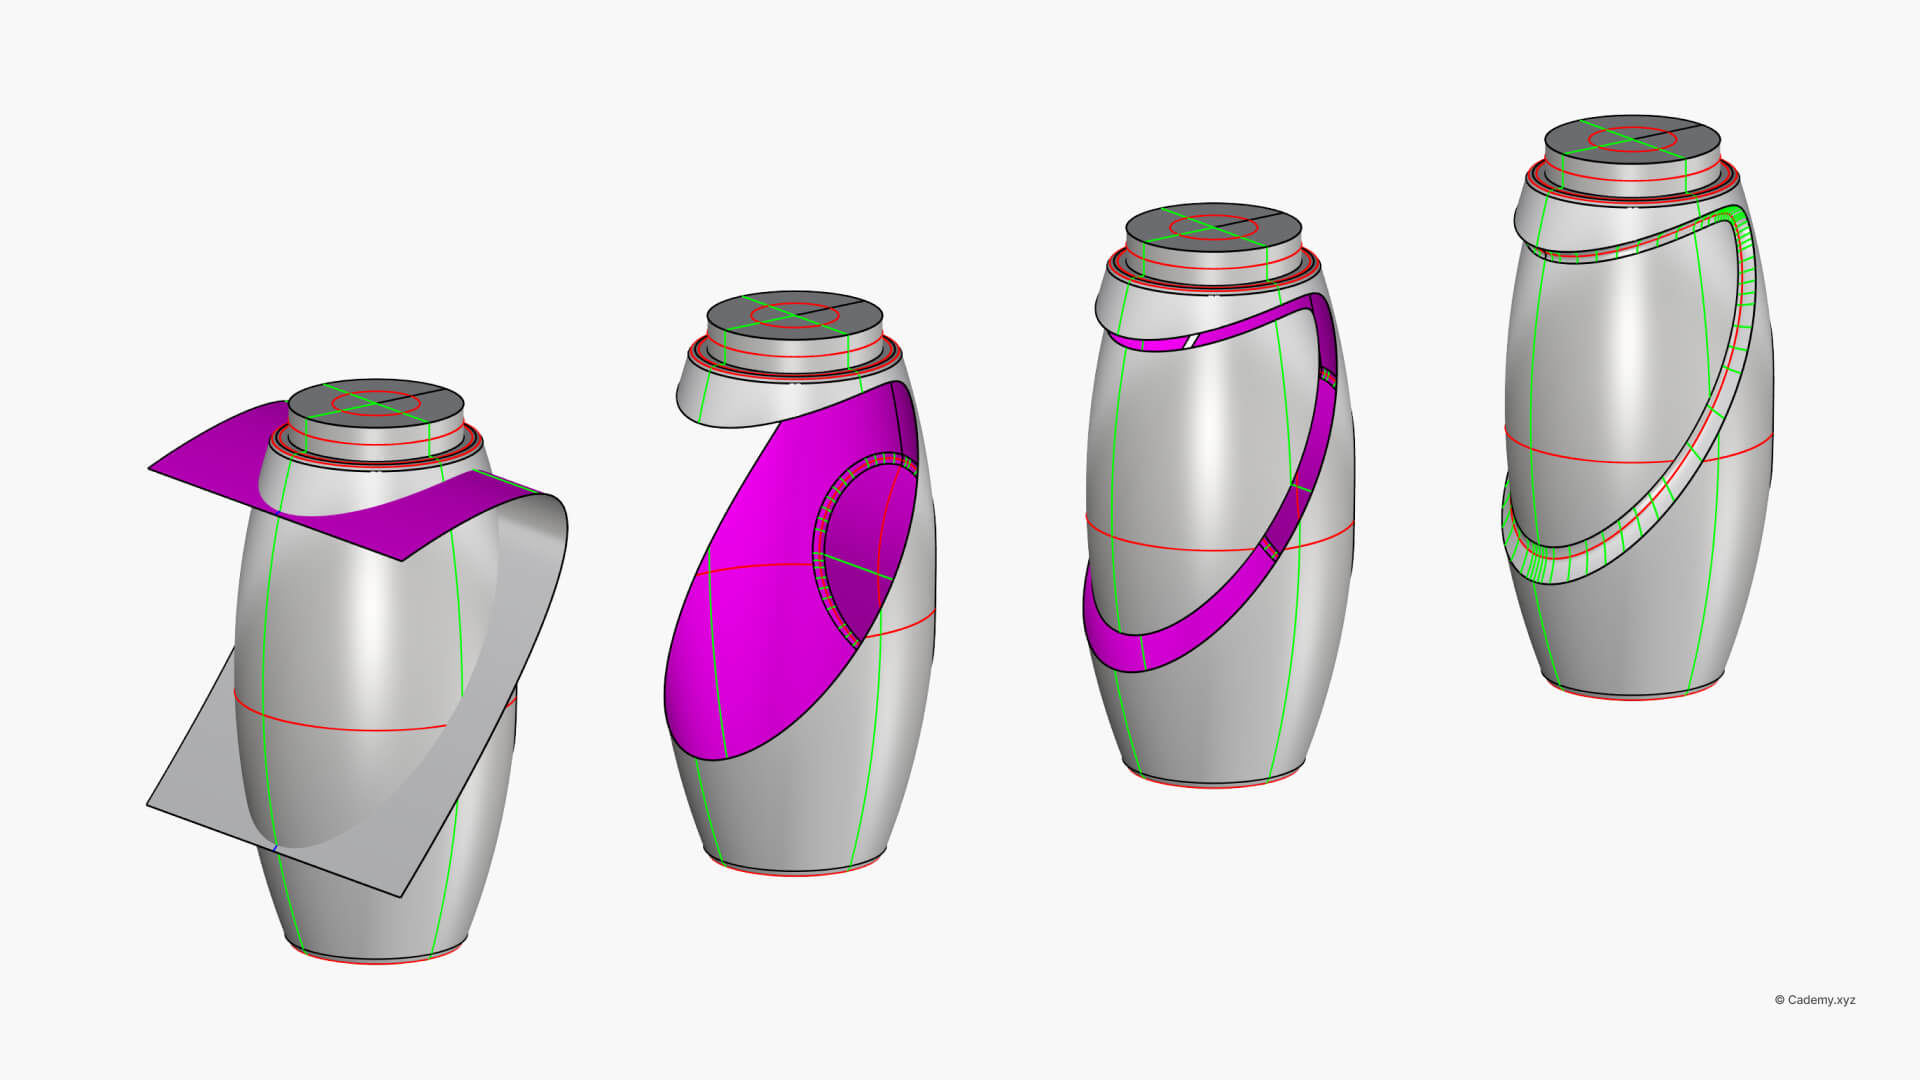
Smooth transitions between the outer body and the inner recessed area prevent sharp, unmanufacturable edges.
- Use the edge curves from the outer cutout to split the outer revolve surface.
- Run the
BlendSrf(Blend Surface) command between the outer surface edge and the inner recessed surface edge. - Adjust the continuity settings (Tangency or Curvature) to ensure a smooth transition.
- Join the outer surface, blend surface, and inner grip surface into a single polysurface.
Step 4: Shelling and Neck Threads
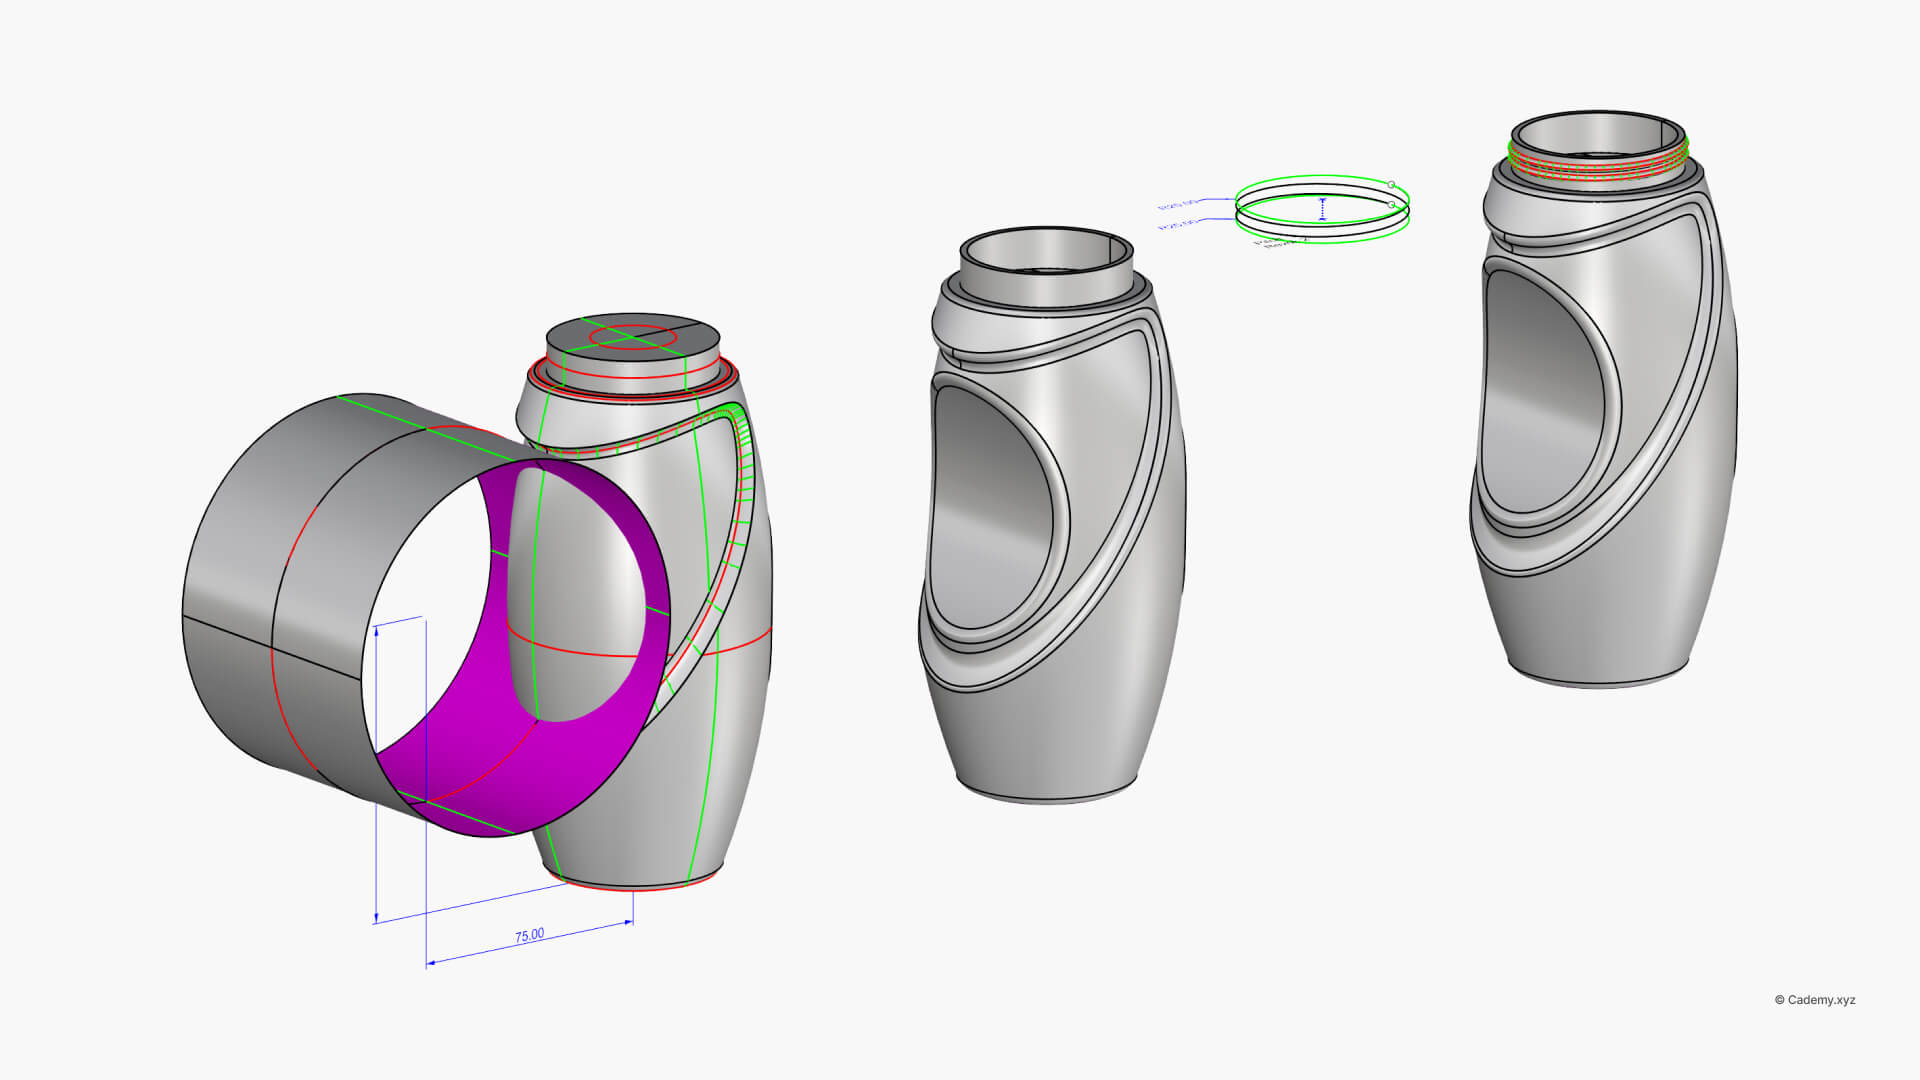
Once the exterior surface geometry is finalized, convert the model into a solid container and build the thread mechanism.
- Run the
Shellcommand, select the top mouth surface to open, and set your desired wall thickness. - Create the thread path using the
HelixorSpiralcommand aligned to the top neck cylinder. - Apply the
Pipecommand to the helical curve (using a rounded or custom profile) to form the thread geometry. - Cap the ends of the pipe and run
BooleanUnionto fuse the thread solid into the main bottle neck.
Step 5: Texture and Grip Patterning
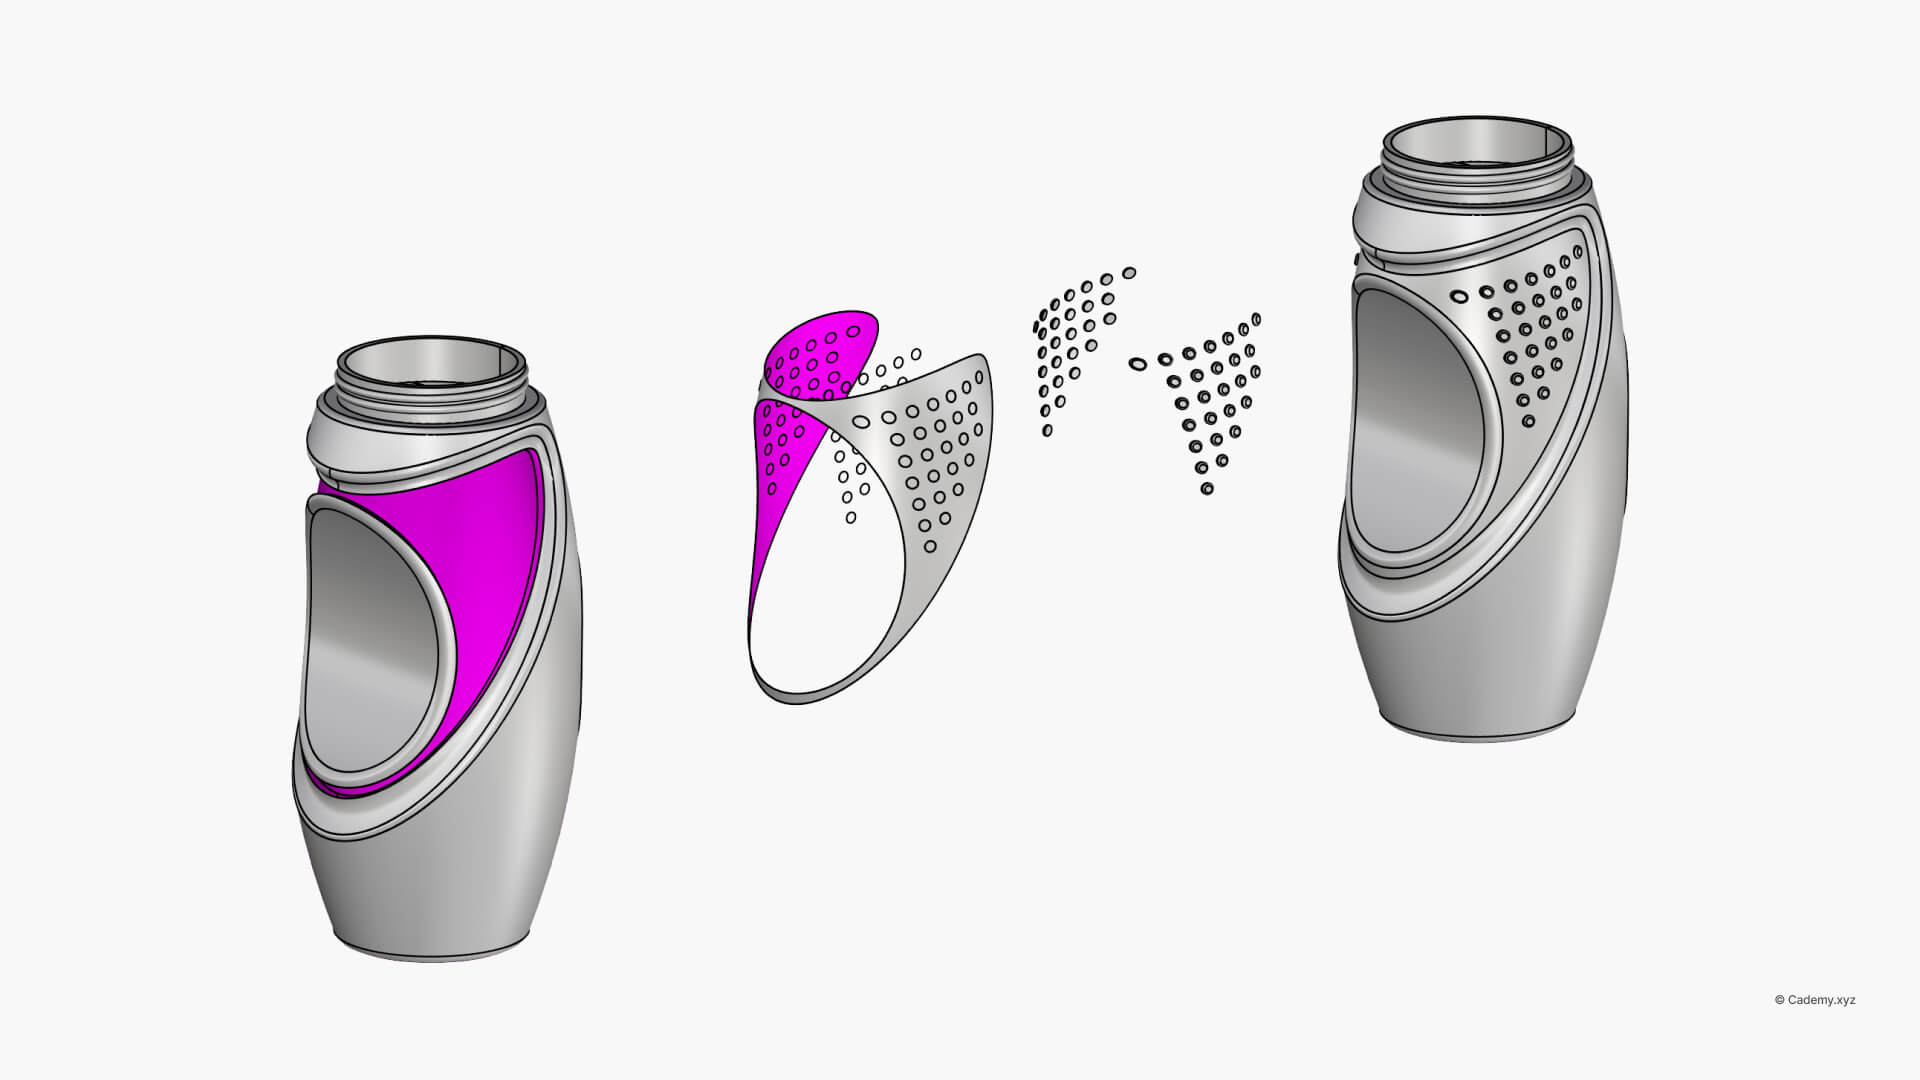
Adding a tactile bump pattern requires projecting 2D arrays onto the curved recessed surface.
- Extract or explode the recessed grip surface created in Step 3 and isolate it.
- Create a 2D circular pattern grid on a flat construction plane parallel to the grip surface.
- Run
ProjectorCreateUVCurves/ApplyUVCurvesto map the pattern onto the curved surface. - Use
Trimto split the surface using the projected circles. - Extrude the trimmed circular shapes outward using
ExtrudeSrfto generate the raised solid bump pattern. - Join all components back into a closed solid polysurface.
Step 6: Cap Mechanism and Thread Tolerances

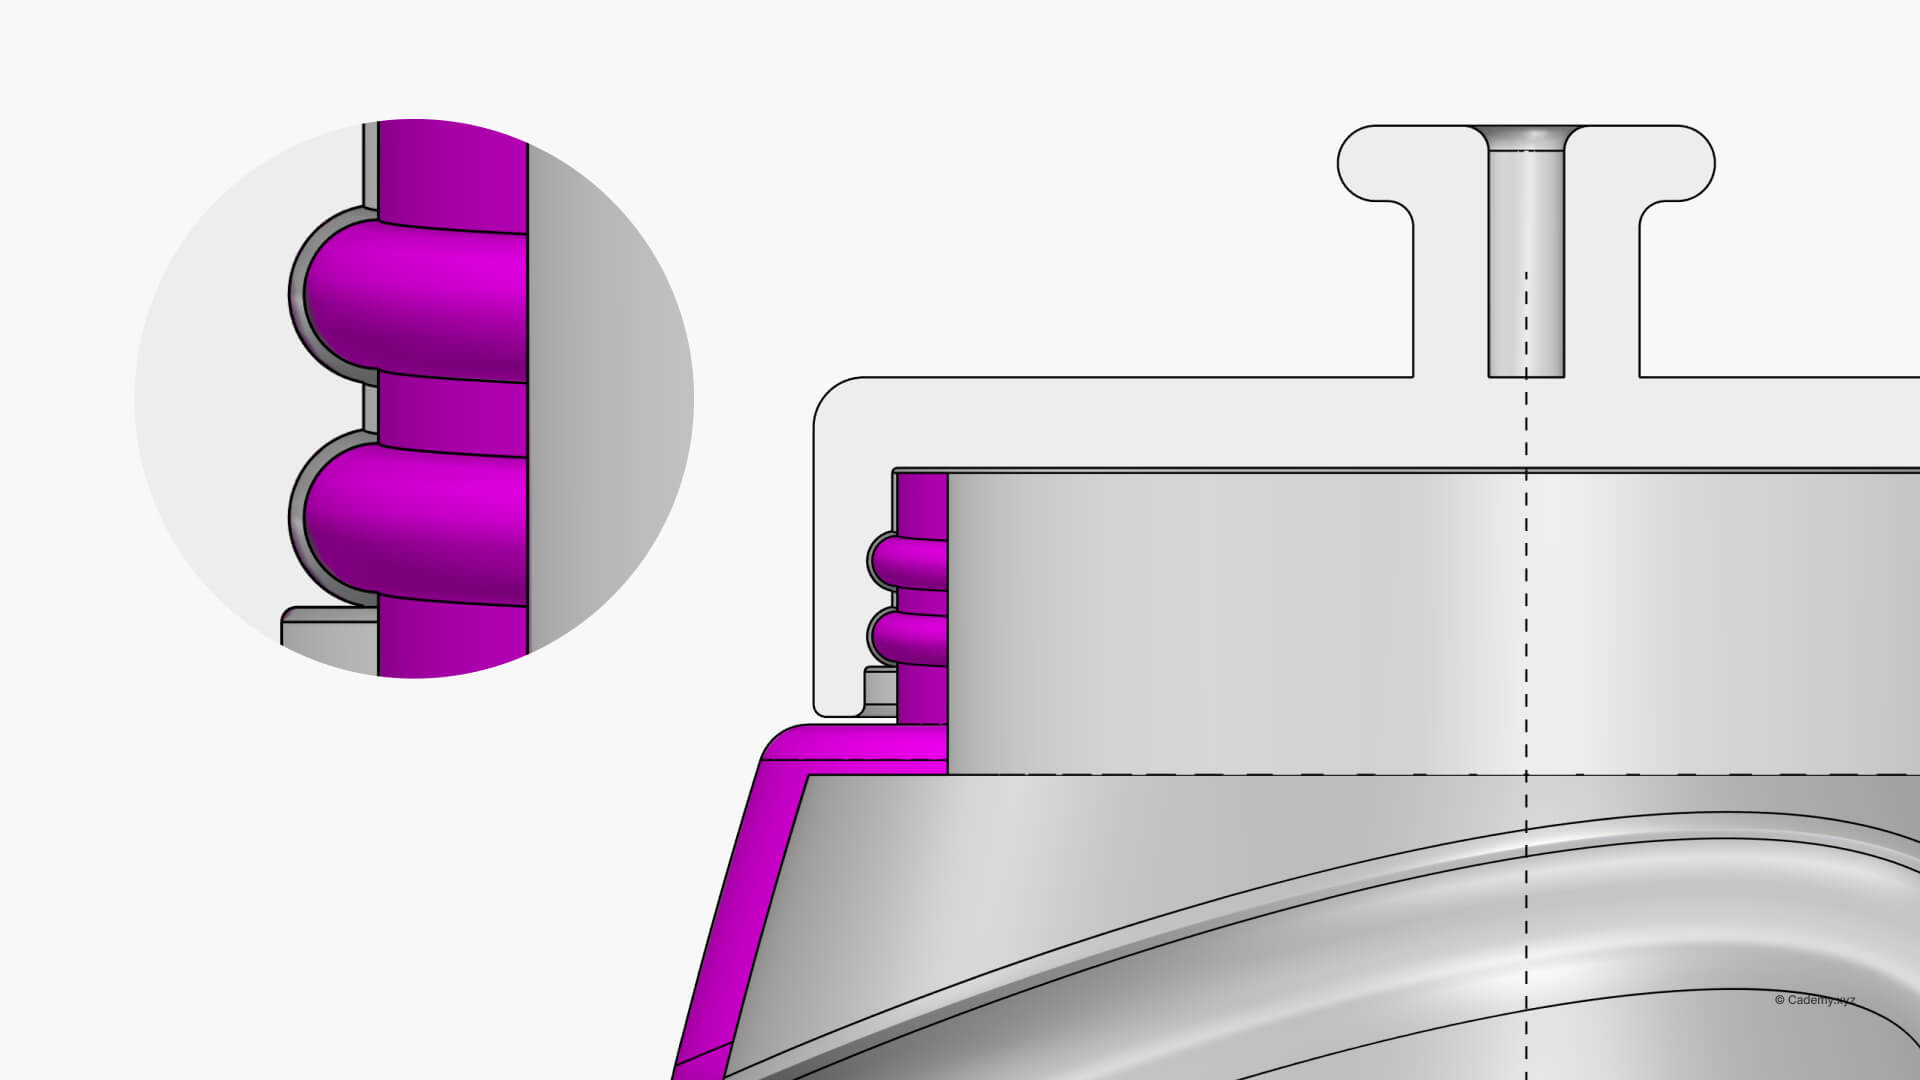
The cap must match the neck geometry precisely while leaving enough clearance to thread smoothly in production.
- Model the basic exterior 2D profile of the cap and revolve it over the bottle neck.
- Perform a
BooleanDifferenceusing the bottle's thread geometry to cut the matching internal threads inside the cap. - Select the internal thread surfaces of the cap and use
OffsetSrfto enlarge the inner void by 0.2 mm. This step provides the real-world manufacturing tolerance required to prevent binding.
Let us know on our YouTube channel if you found this walkthrough helpful and what Rhino 3D techniques or tools you want us to cover next.


