iPhone 17 Pro 3D Modeling Tutorial | Rhino Class-A Workflow

Creating High-Quality Fillets in Rhino: A Class-A Workflow Inspired by Apple
When I first saw the iPhone in person, what immediately caught my attention was the camera plateau transition and the overall surface quality. The way Apple handles these transitions is subtle, controlled, and extremely refined.
Download File
At the same time, I’ve seen many students—especially in earlier stages of learning—rely on simple G1 fillets to smooth corners.
While G1 fillets are quick and easy to apply, they often create breaks in highlights, which is not acceptable for premium consumer products. That’s the reason behind this tutorial.
In this workflow, I’ll show you how to “fake” a simple G1 fillet while actually achieving a much higher surface quality by using G3 continuity instead—similar to how Apple approaches surface transitions.
To demonstrate this clearly, I’ll use an iPhone as the example product.
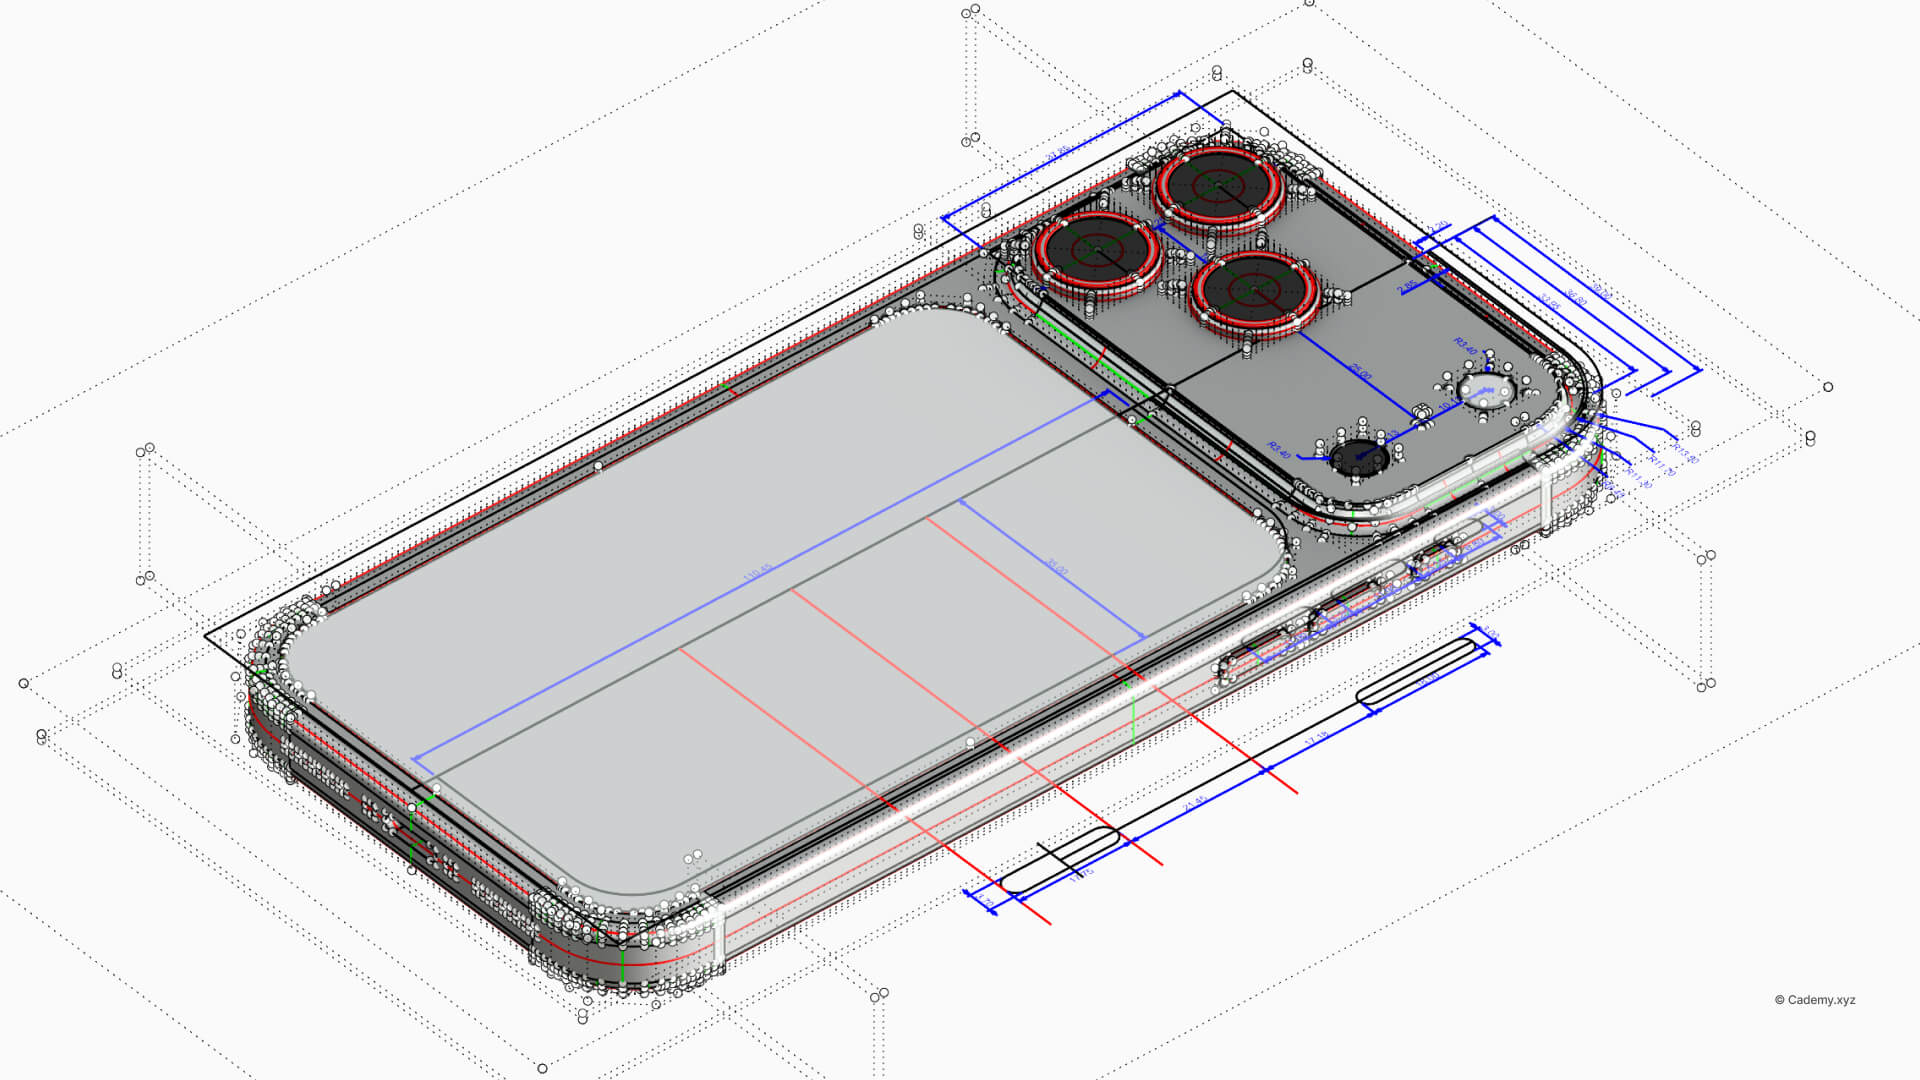
Step 1 — Create the 2D Drawing Using Reference Images

We start by creating accurate 2D construction drawings using reference images.
Top and side view reference images are imported, aligned, and scaled correctly. From these references, we define:
- the overall dimensions
- symmetry axes
- camera layout
- and key component positions
At this stage, we only use lines, rectangles, offsets, and arcs.
No fillets, no blends—just clean, structured curves that define proportions.
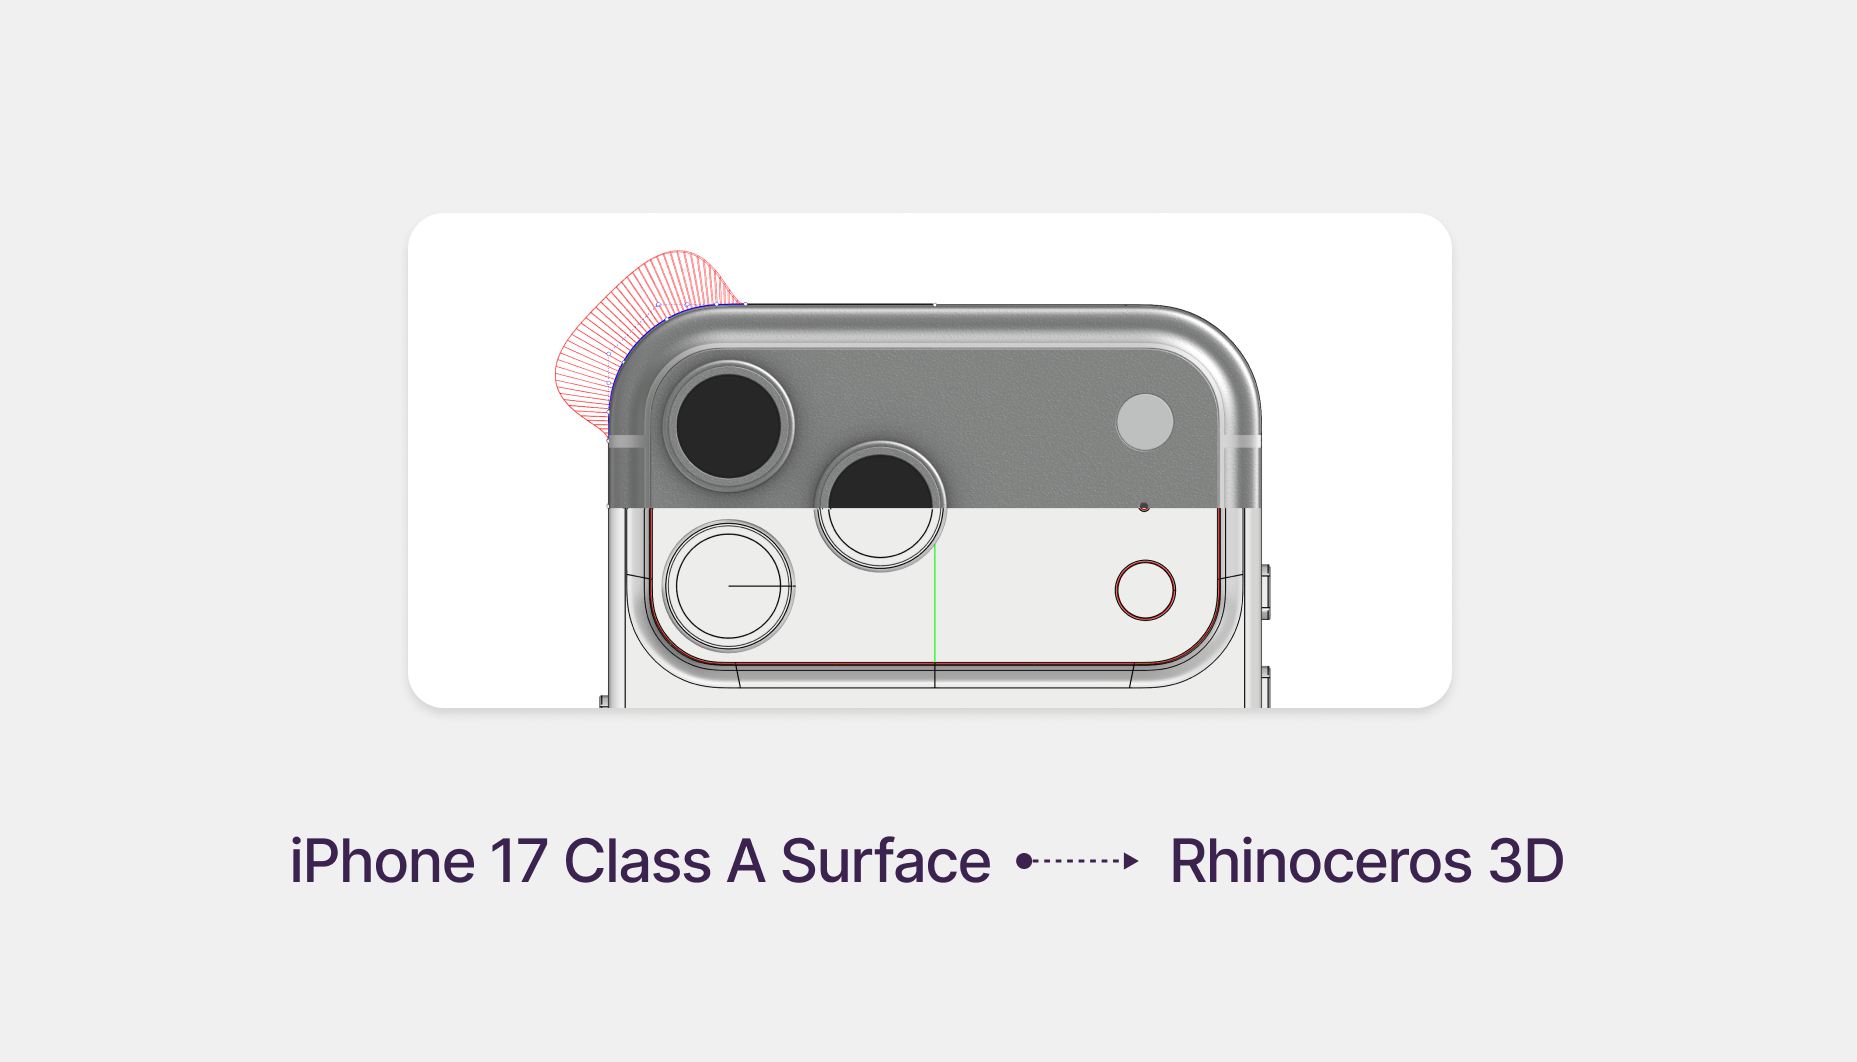
Step 2 — Resolve the G1 Fillet Using G3 Blend Curves

Next, we address the fillet problem.
A G1 fillet is tangentially continuous, but it creates undesirable highlights because the curvature does not transition smoothly between adjacent surfaces.
Instead of using the G1 fillet as a final solution, we:
- Apply a G1 fillet only as a temporary reference
- Trim back the adjoining curves slightly to create a transition zone
- Replace the fillet using the BlendCrv command with G3 continuity
This allows the curvature to ramp up gradually from the flat area, peak smoothly, and dissolve symmetrically—resulting in clean, uninterrupted reflections.
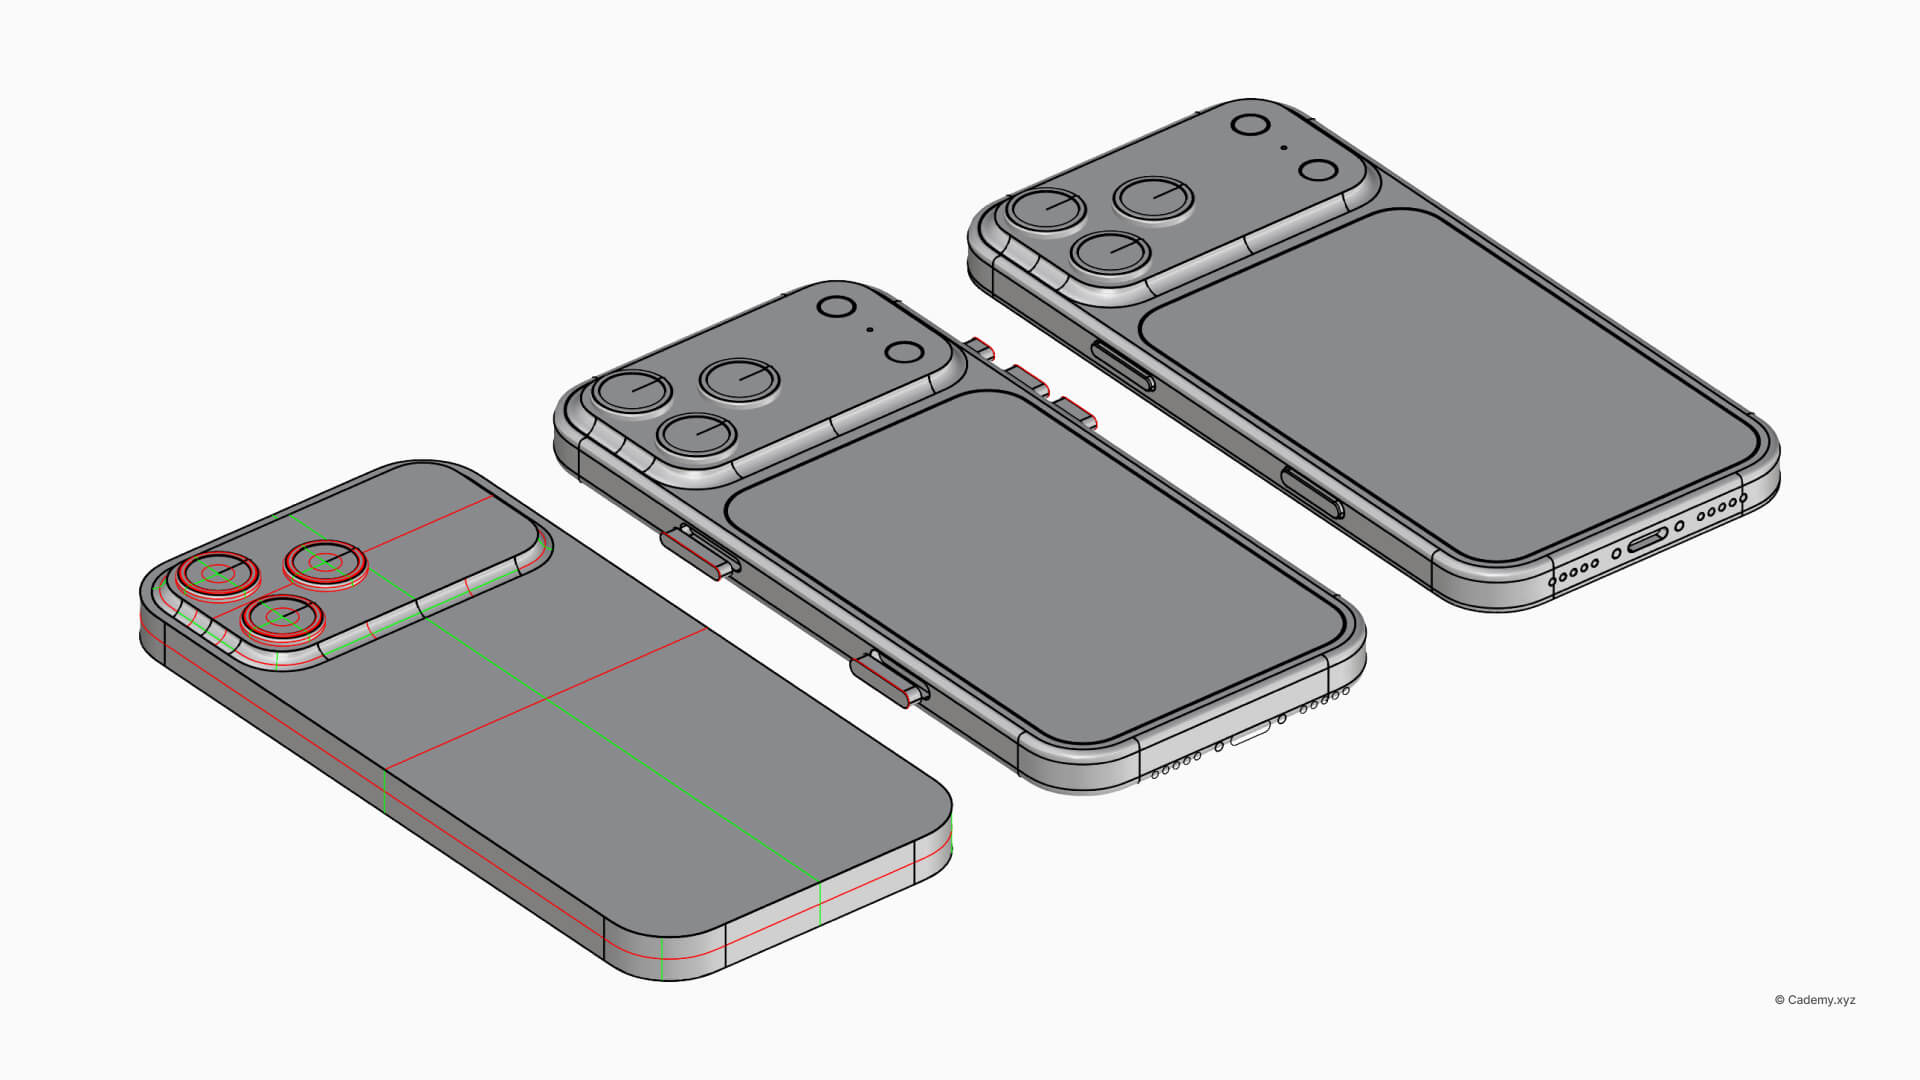
Step 3 — Create Class-A Surfaces Using Single-Span Geometry

With the final curves resolved, we move into surface creation.
We use these single-span curves to build surfaces from four edges, ensuring:
- minimal control points
- predictable surface behavior
- clean curvature flow
To resolve continuity between adjacent surfaces, we use the Match Surface command, typically with G2 continuity, depending on the design intent.
This step is crucial for achieving true Class-A surface quality.
Step 4 — Add Details Using Solid Modeling
Once the surfaces are finalized, we move into solid modeling to add functional details.
Using Boolean operations—such as Union, Difference, and Split—we add:
- buttons
- speaker grille perforations
- USB-C port
- antenna band cutouts
By keeping these operations until the end, we avoid compromising the surface quality established earlier.
Final Thoughts
This workflow demonstrates how to create high-quality “fillets” without relying on basic G1 fillet tools.
By combining:
- disciplined 2D construction
- G3 blend curves
- single-span surface strategies
- and controlled solid detailing
you can achieve Class-A surface models suitable for premium consumer products.
We hope you found this workflow useful and that it helps you rethink how you approach fillets and surface transitions in Rhino.
