How to Model a Golf Ball in Grasshopper 3D


How to Model a Golf Ball in Grasshopper 3D
Learn to create a realistic golf ball using parametric modeling techniques in Rhino and Grasshopper.
Before You Start
Make sure you have Weaverbird installed.
You can do this directly from Rhino’s Package Manager — just search for “Weaverbird” and click Install.
Download File
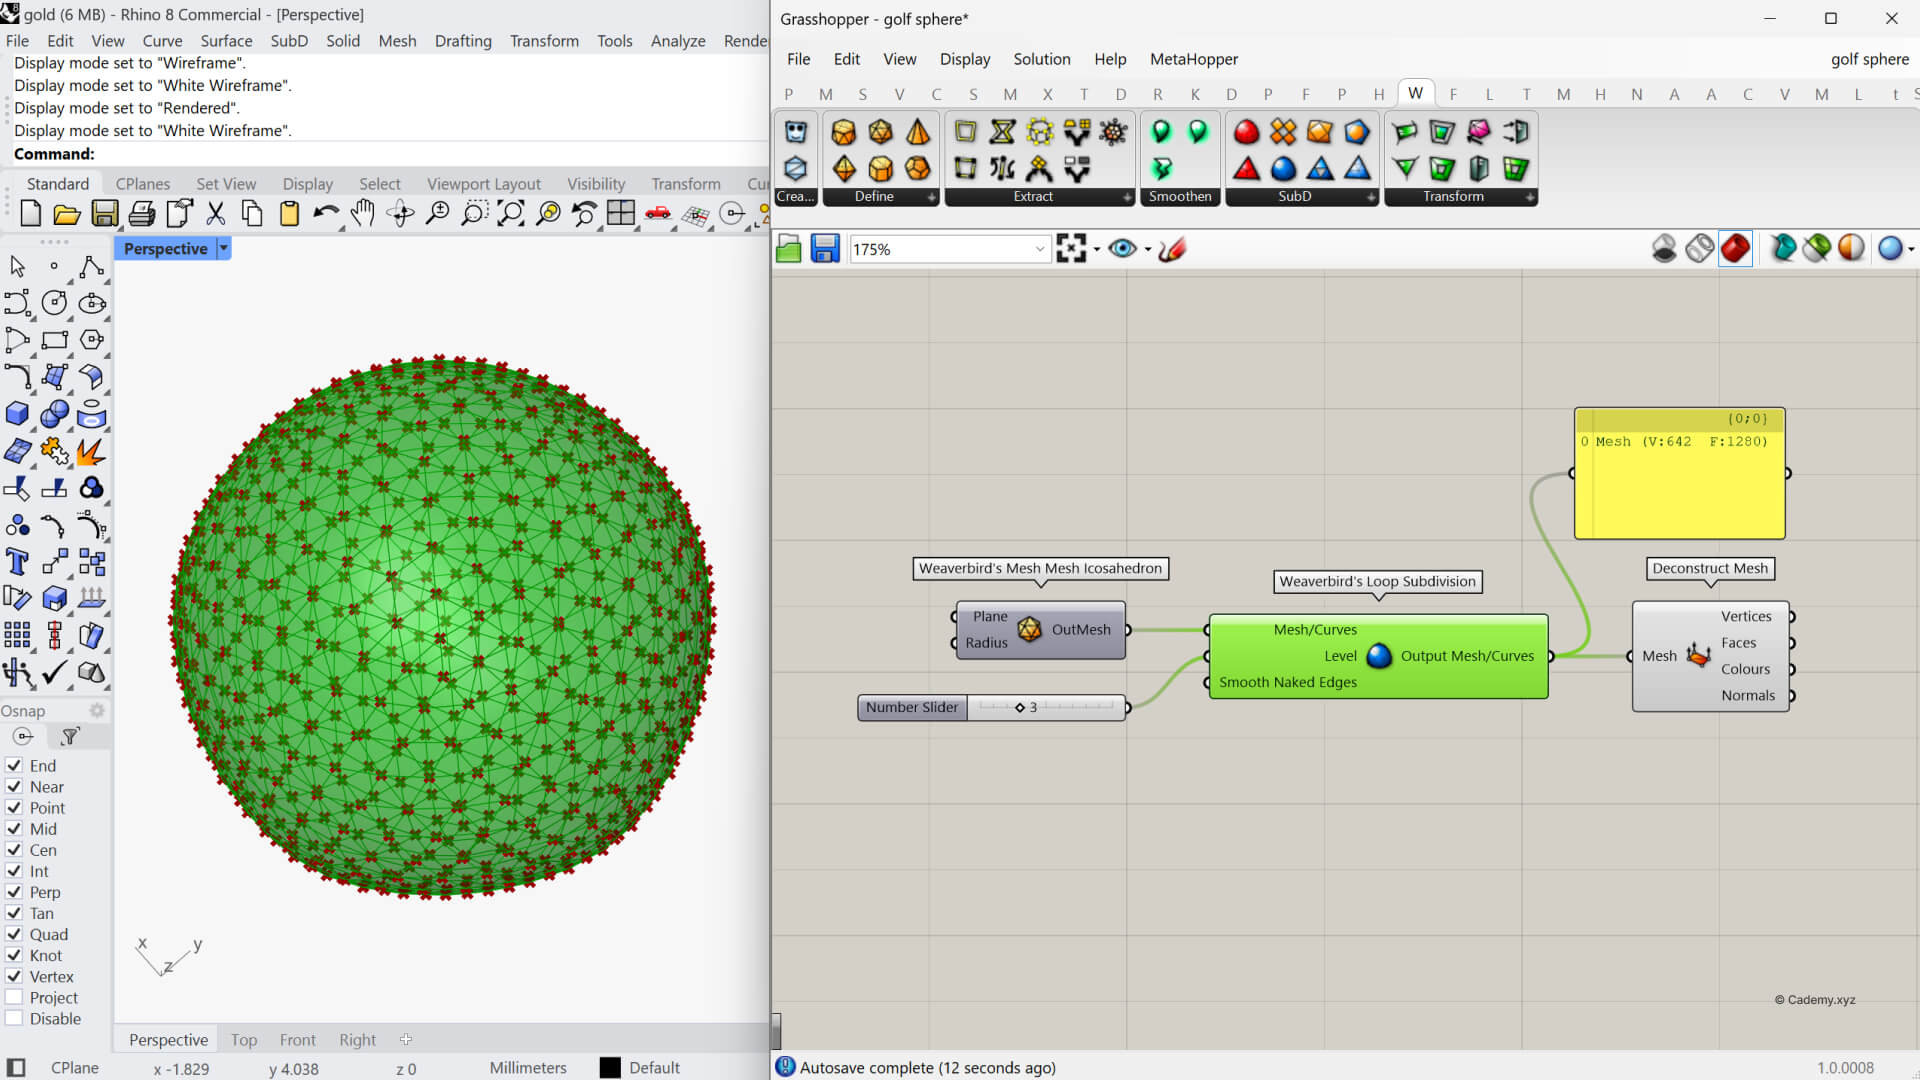
1. Create the Base Icosahedron
We’ll start with Weaverbird’s Mesh Icosahedron to evenly distribute points across the surface.
If you don’t see the mesh edges, enable Mesh Edge Preview in the display settings.
By default, the icosahedron only creates 12 vertices, but we can use Weaverbird’s Loop Subdivision to increase this count:
- 12 → 42
- 42 → 162
- 162 → 642
This gives us a denser and smoother point distribution for the golf ball dimples.
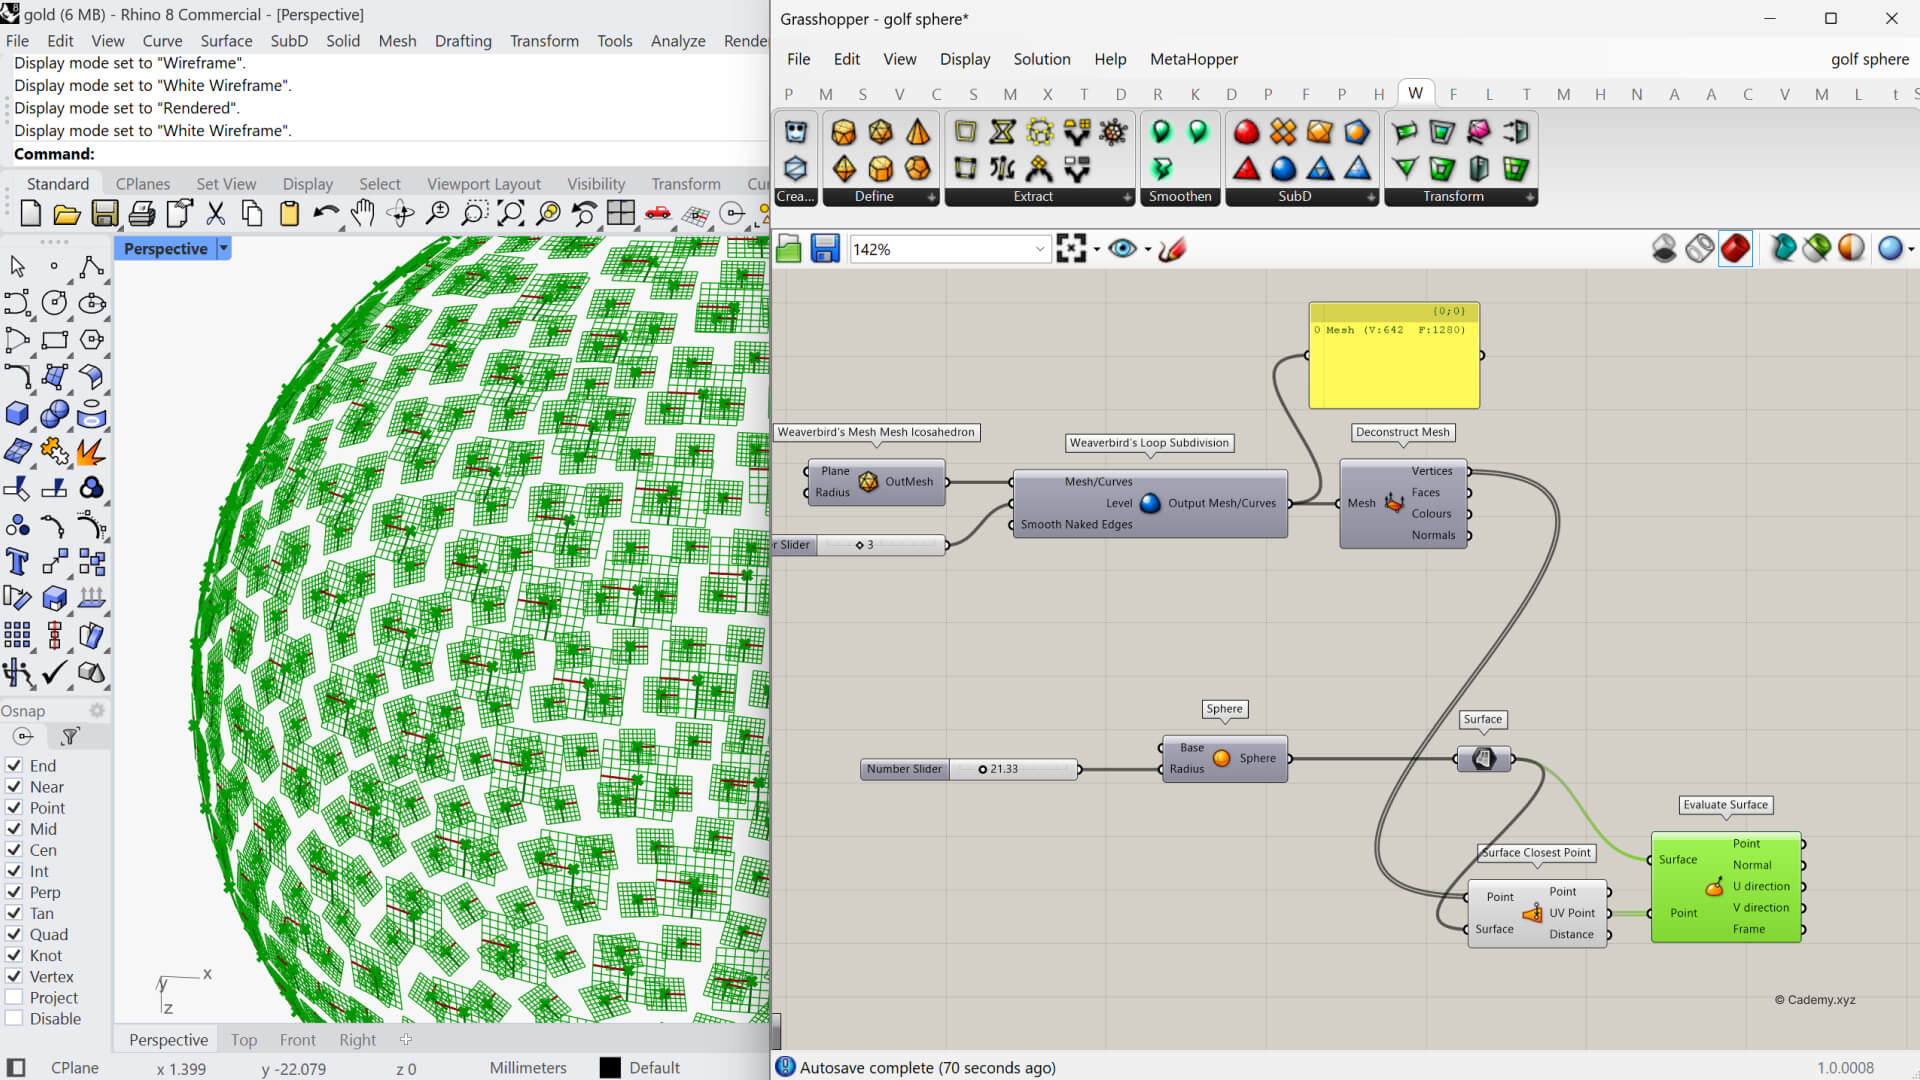
2. Add the Main Sphere
Next, create a Sphere with a radius of 42.67 — this will be the main golf ball body.

3. Extract Mesh Vertices and Align Them
Use Deconstruct Mesh to extract the vertices of the subdivided icosahedron.
These points represent where each dimple will be positioned.
Now, use Surface Closest Point to pull those vertices onto the sphere surface.
This step gives you UV coordinates that help you generate normal planes perpendicular to the golf ball surface.
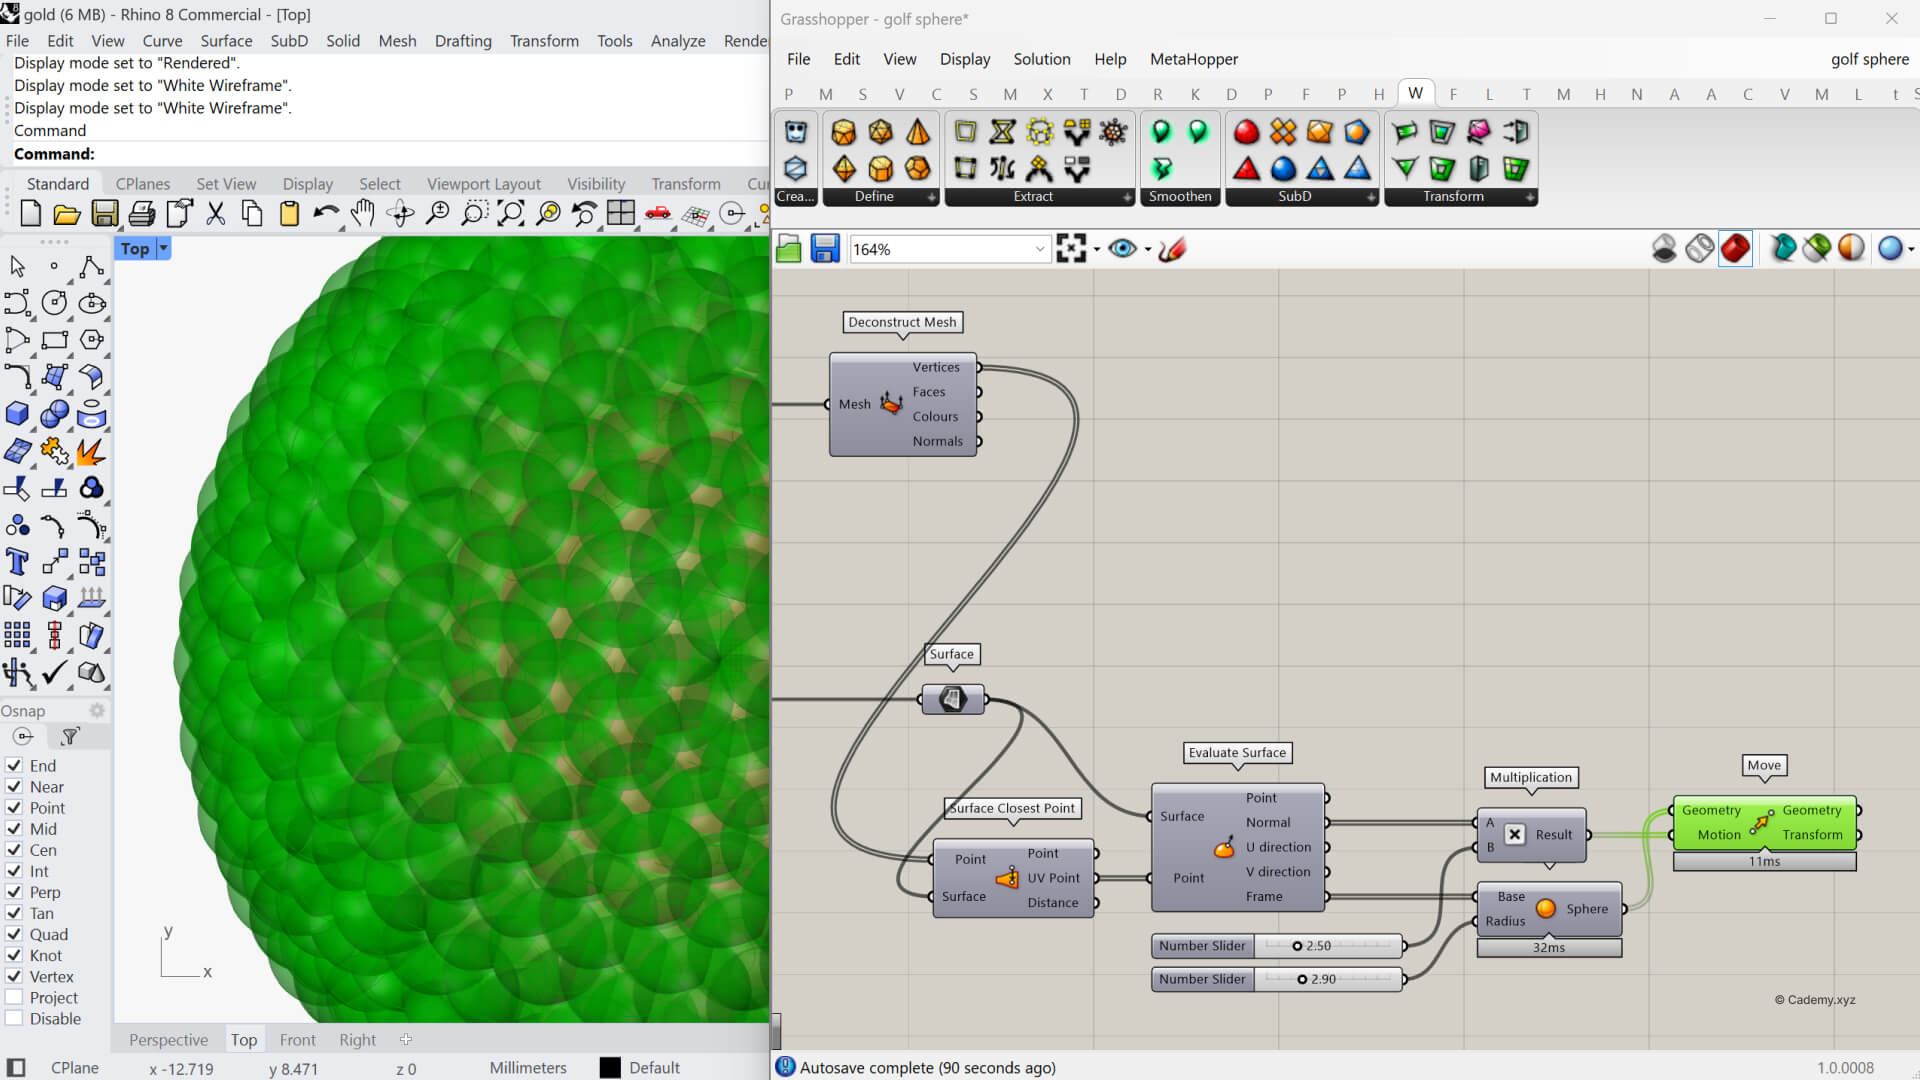
4. Generate the Dimple Texture
Before adding the dimples, reduce the subdivision count to 1 — this makes the definition lighter and faster to test.
Once you confirm it works, you can increase the count later for more dimples.
Now, place small spheres (around 5.8 radius) on the normal planes.
Move them slightly in the normal direction (negative) to form concave dimples on the surface.
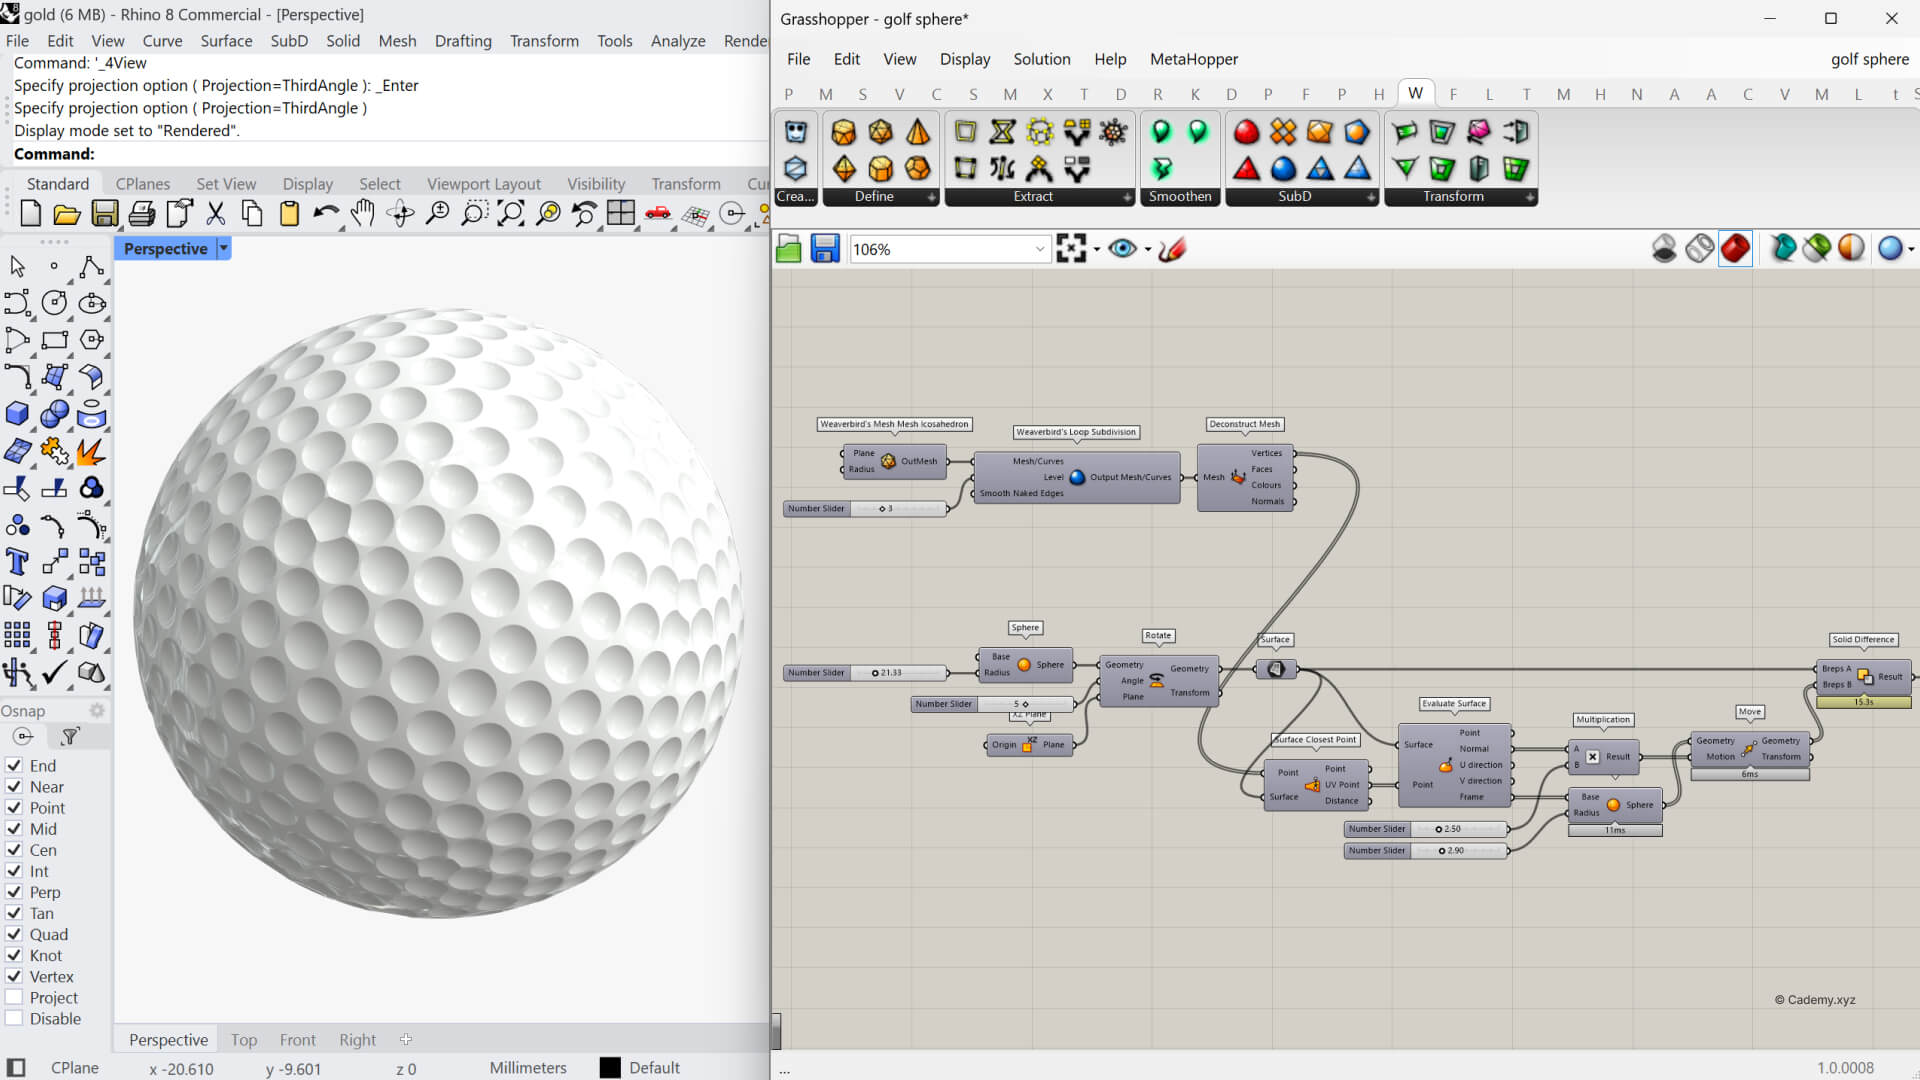
5. Subtract the Dimples
Now it’s time for the boolean operation.
Use Solid Difference:
- A = main golf ball sphere
- B = smaller dimple spheres
This will cut the dimples into the golf ball surface.
Depending on your subdivision level, this operation can take a few seconds to process.
If you see artifacts near the poles, that’s due to overlapping seams.
Simply rotate the base mesh on a random axis before the boolean step to clean it up.
Use Custom Preview to visualize the final result.
Assign a white or light-gray Swatch Material for a realistic golf ball appearance.
You can bake the geometry into Rhino to render in KeyShot, V-Ray, or Cycles for a photorealistic result.
Tips
- Test with lower subdivision first to keep your definition light.
- Combine Weaverbird’s Smooth Mesh for softer edges.
- Experiment with Random Reduce to remove a few dimples for added realism.
Conclusion
That’s it — your parametric golf ball is ready!
By adjusting just a few sliders, you can control dimple depth, distribution, and smoothness — all within Grasshopper.
For more hands-on tutorials like this, visit cademy.xyz/learn or join our next live workshop to explore advanced surface pattern workflows.
