Events
Aug 13, 2023
Harman Kardon Speaker Design: Free Rhino 3D & Grasshopper Tutorial

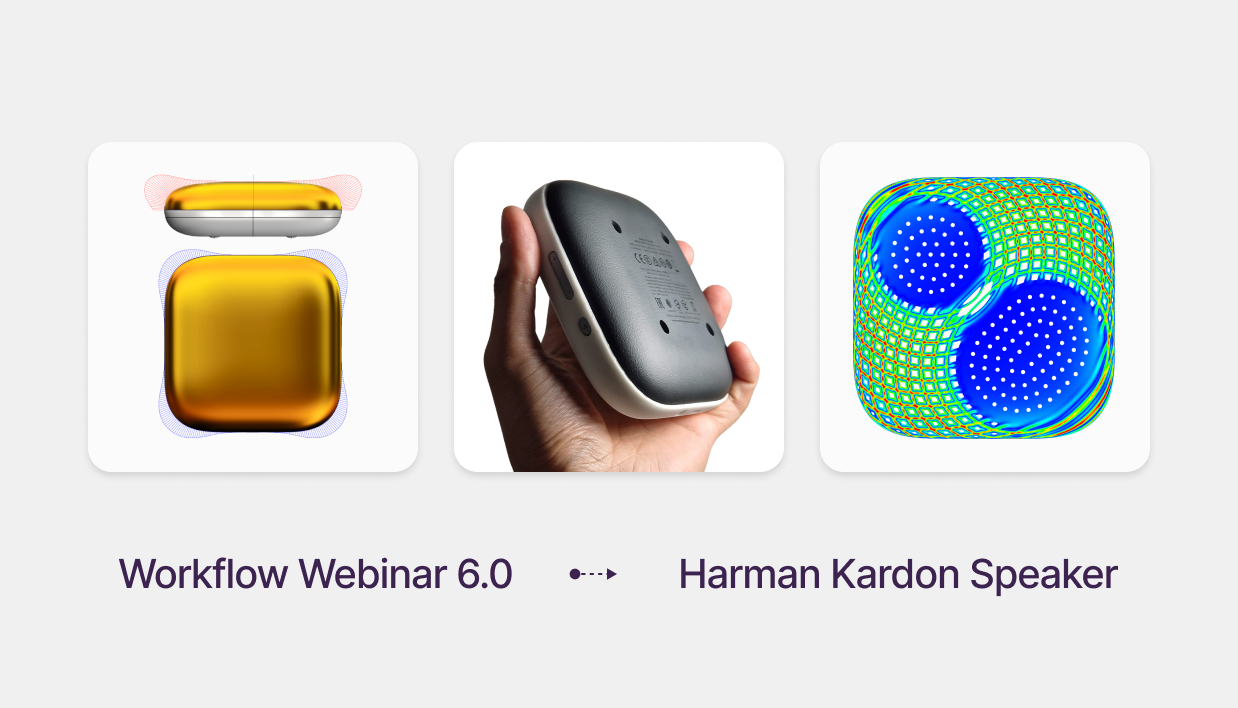
Premium Product Design: Modeling a Harman Kardon Speaker
Free Rhino 3D & Grasshopper Course | Workflow Webinar 6.0
Welcome to the sixth module of our free Rhino 3D and Grasshopper course. In this 1.5-hour technical session, we deconstruct the Harman Kardon Neo. While the form looks simple, achieving the high-end "liquid" reflections requires Class A modeling techniques and G4 curvature continuity. We will also build a custom parametric acoustic texture to finish the design.
Download Files: cademy.xyz/webinar6
What’s included in this lesson:
- Full Video Tutorial: Follow along with our 1.5-hour step-by-step recording.
- Project Files: Download the exact Rhino and Grasshopper files to practice.
- Expert Surfacing: Learn to use single-span Degree 9 curves for professional results.
What you will learn in this module:
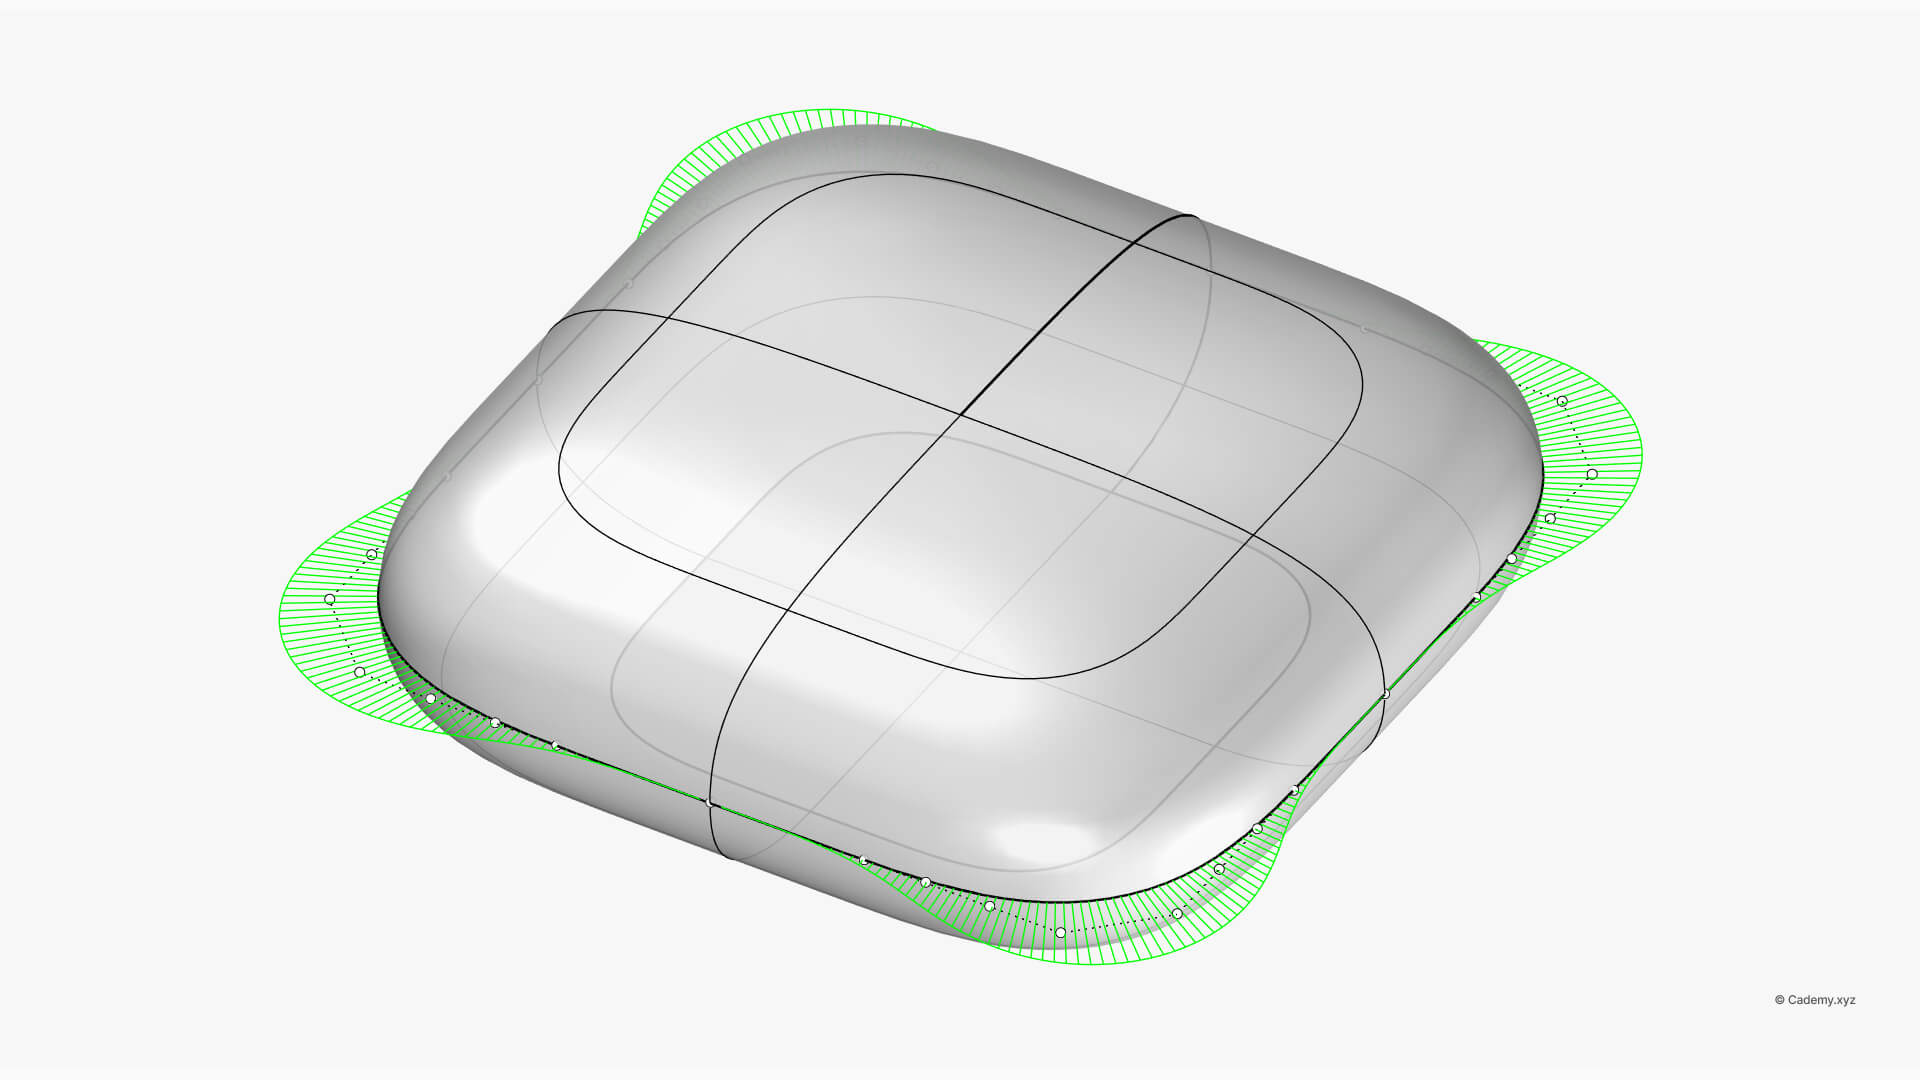
- Class A Surfacing: How to construct single-span, high-degree curves (Degree 9) to ensure the highest surface quality possible in Rhino 3D.
- G4 Curvature Continuity: Moving beyond basic fillets to achieve perfect, seamless transitions between surfaces.
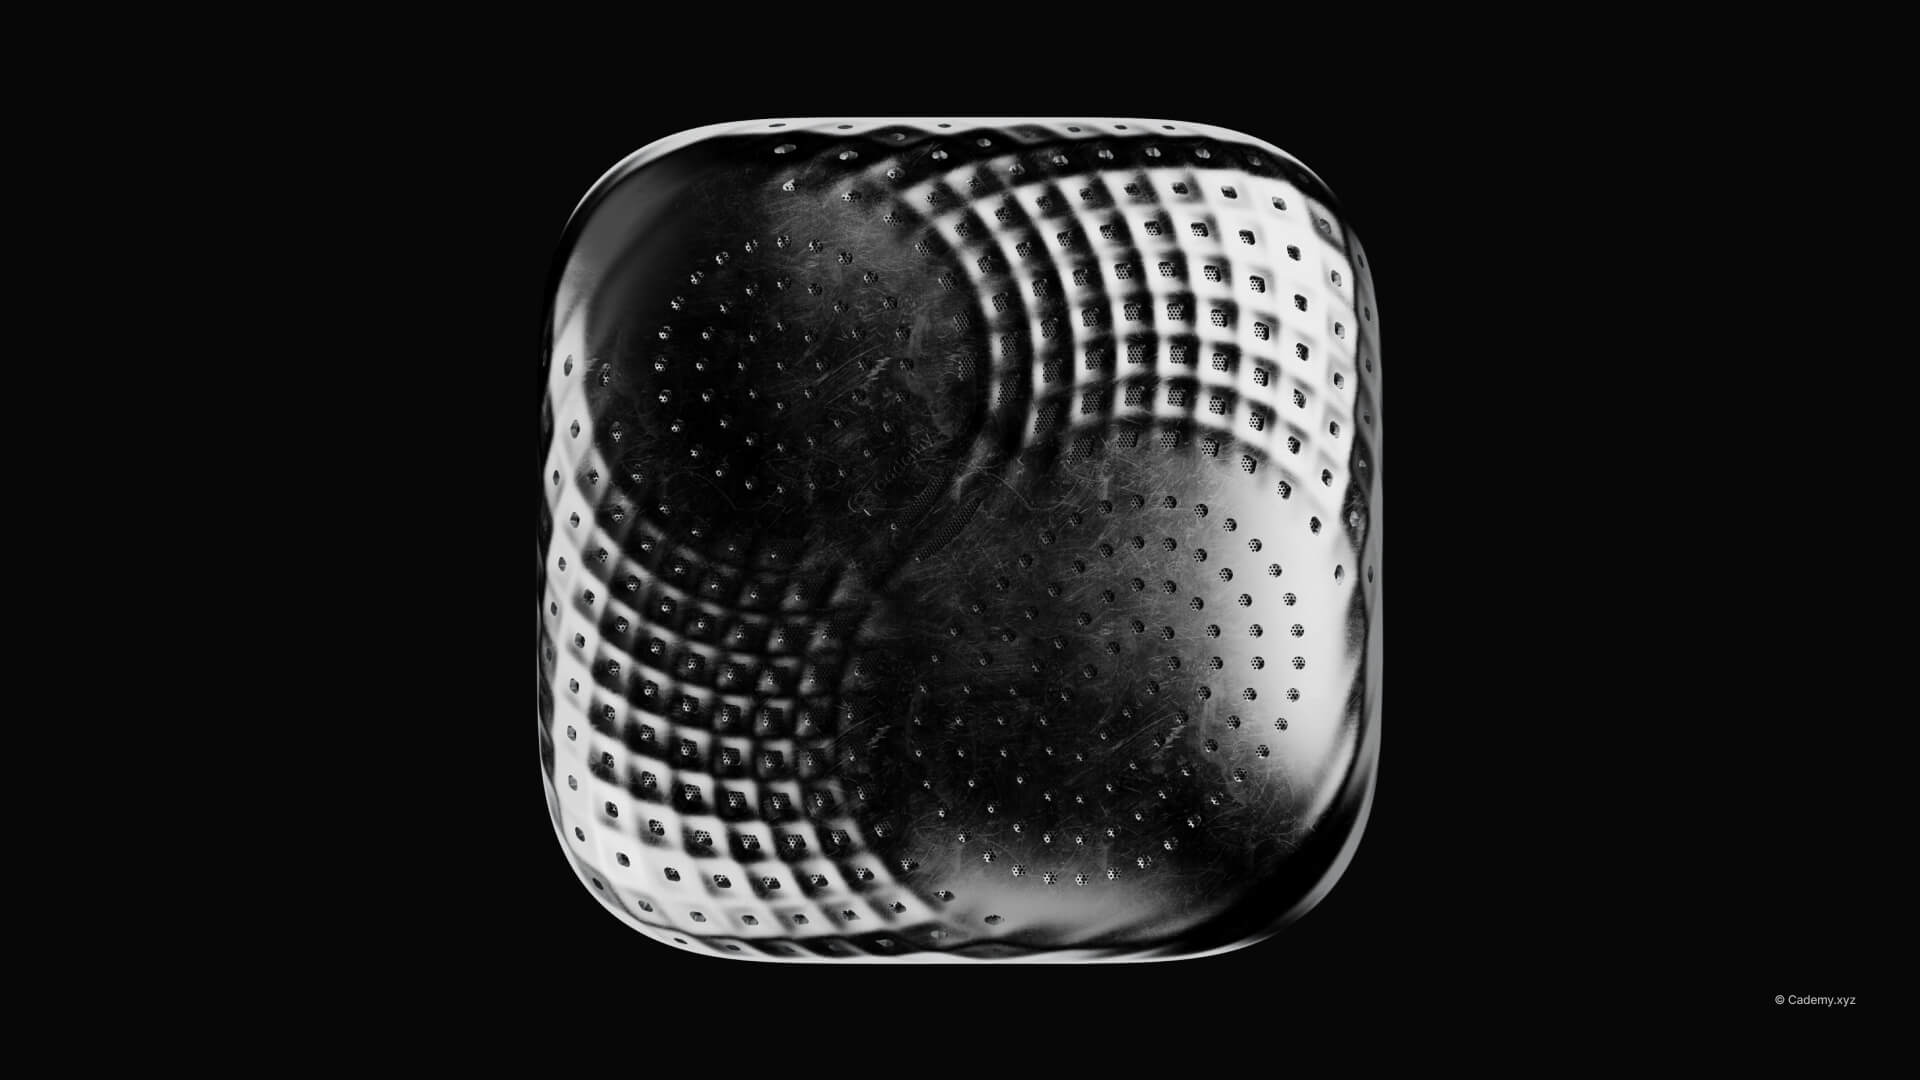
- Parametric Acoustic Textures: Using Grasshopper to create complex speaker grilles that distort dynamically across curved faces.
- Boundary Curve Attractors: Learning to use geometric boundaries to control and vary pattern density algorithmically.
- Professional Topology: Preparing a "clean" closed polysurface model for manufacturing and high-fidelity rendering.
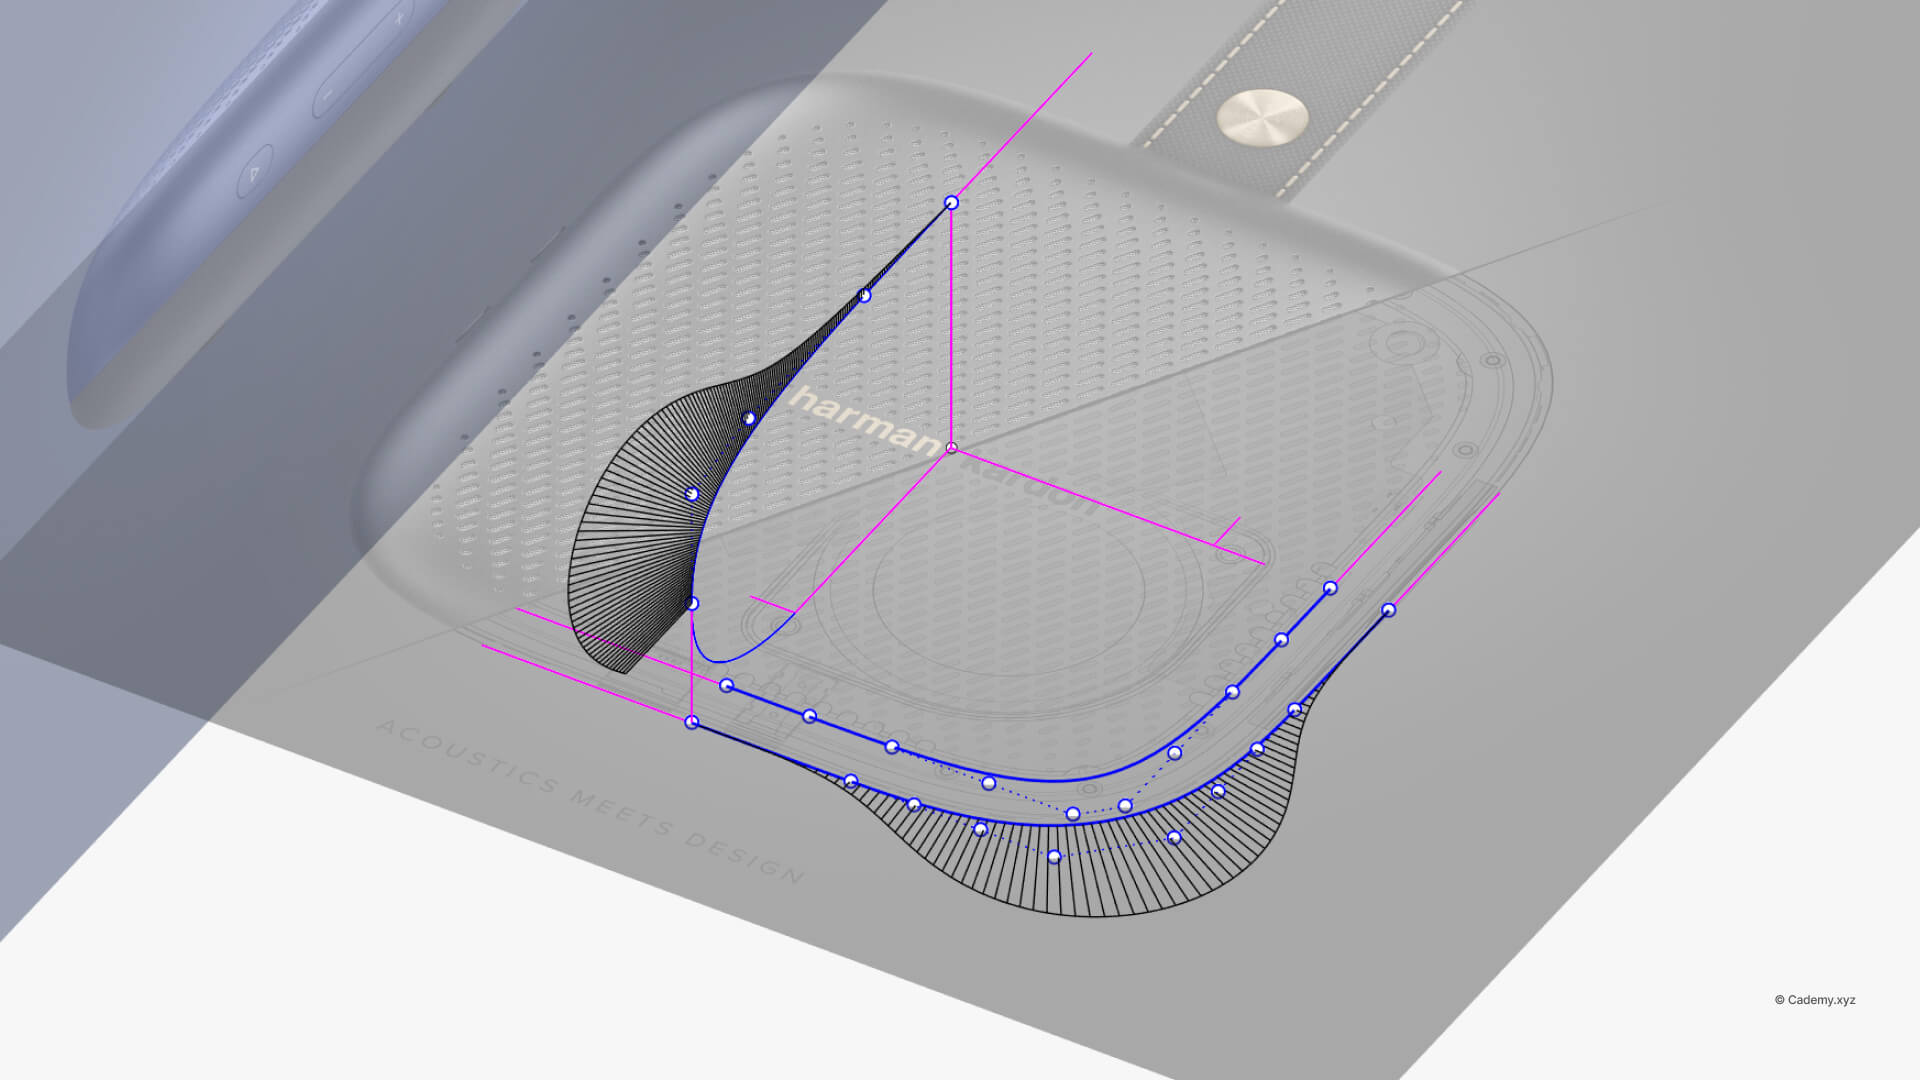
Step 1: Construct the Guide Curves
- Start from the top view to maintain proper proportions.
- Ensure precise dimensions between the curves.
- Model only one-quarter of the full shape to maintain symmetry.

Step 2: Create Blend Curves
- Use the Blend Curve tool to connect the guide curves.
- Aim for G4 continuity to ensure a smooth, high-quality transition.
- Generate a single-span, degree 9 curve for optimal precision.
- Check the curvature graph to ensure smooth fading.
Step 3: Mirror the Geometry
- Mirror the quarter section to complete the full circular shape.
- Ensure all mirrored segments align perfectly before proceeding.
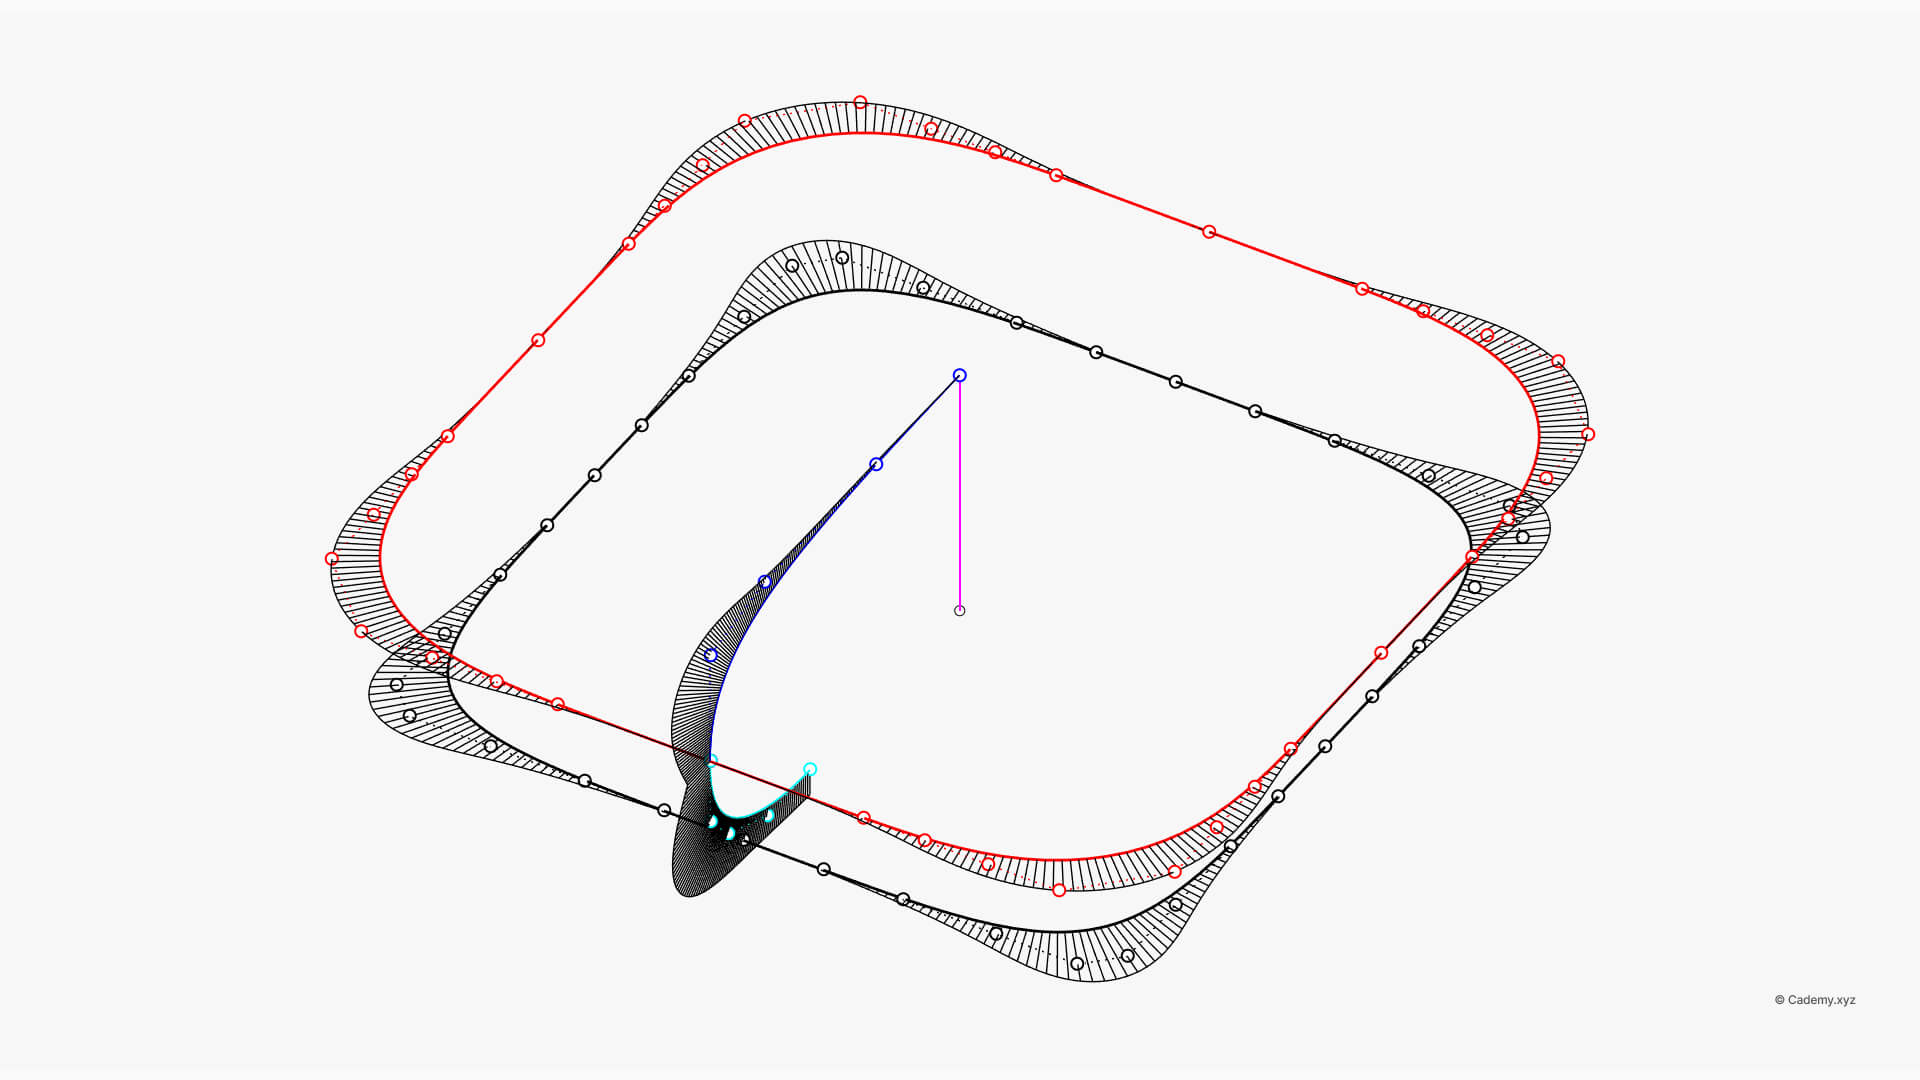
Step 4: Rail Revolve
- Use the Rail Revolve command to create the main body.
- This will generate a single, closed surface with seamless curvature.
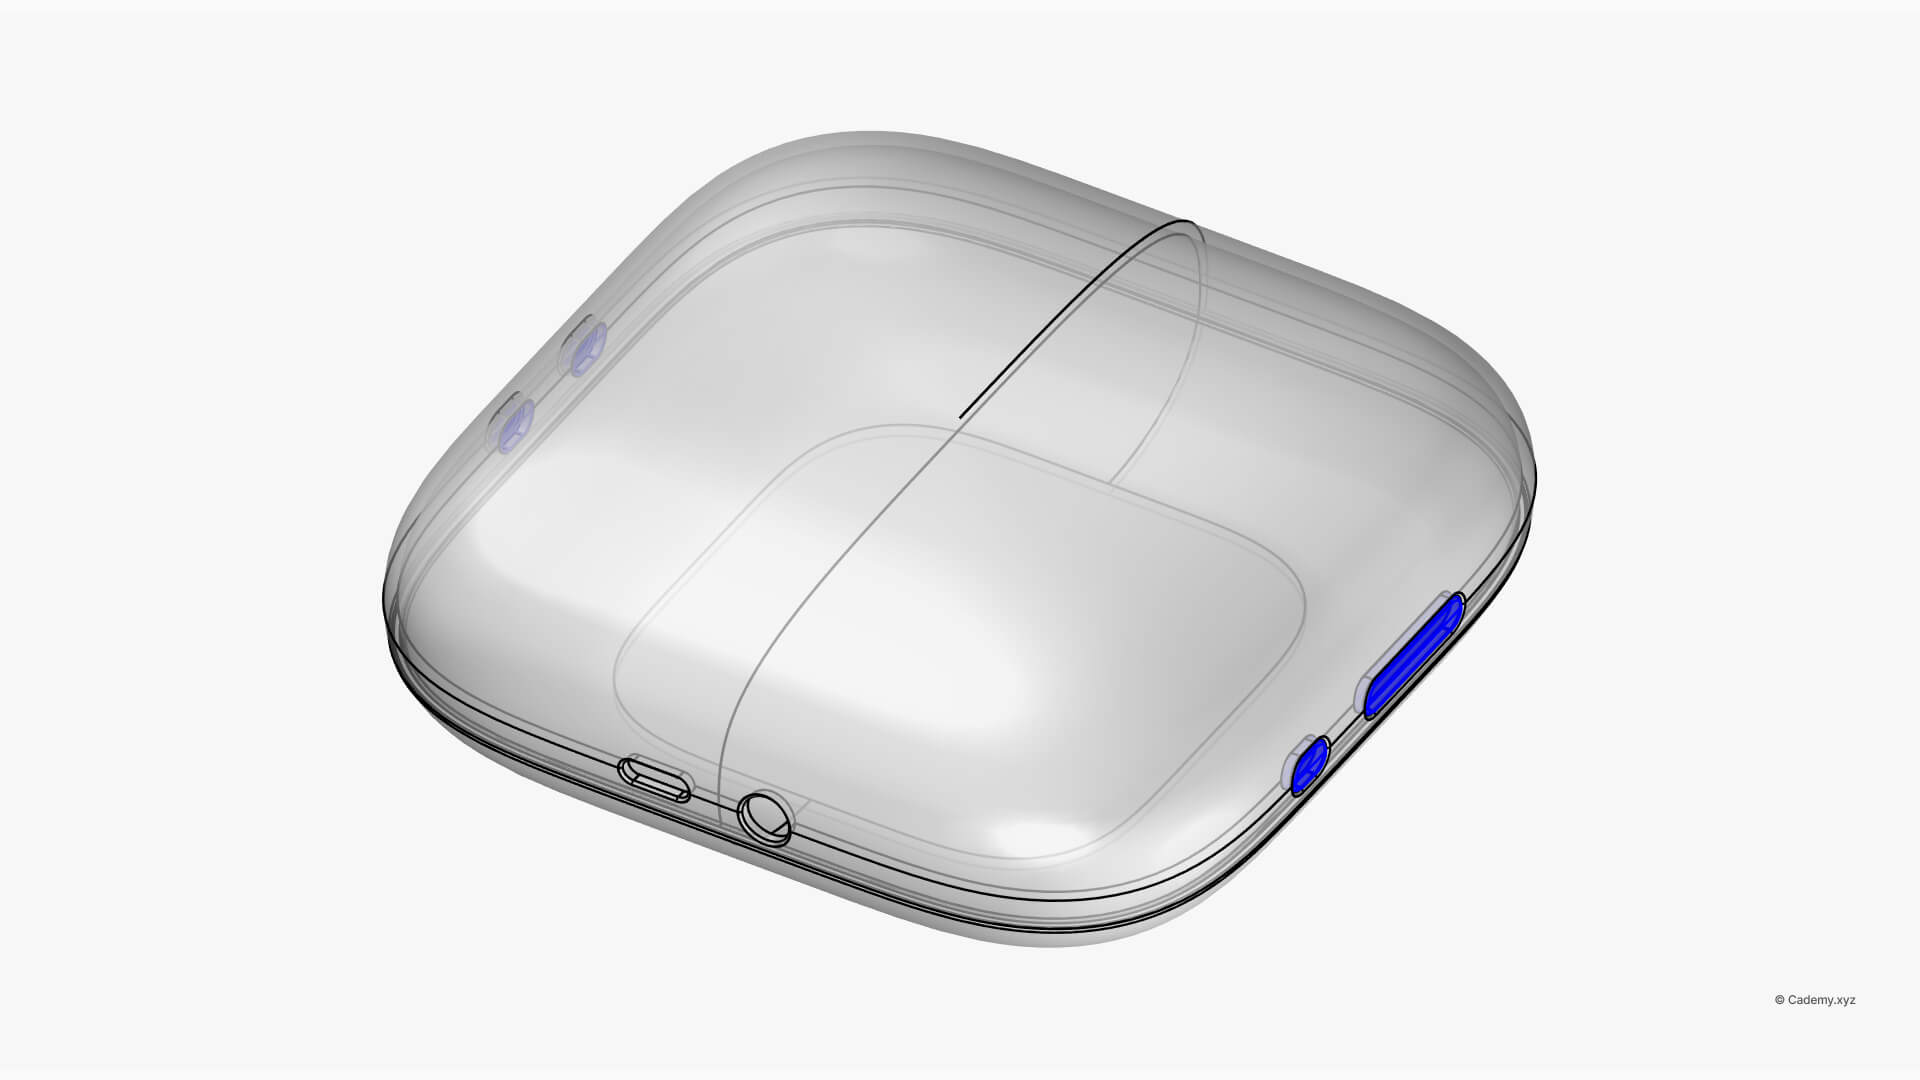
Step 5: Add Buttons
- Use solid modeling techniques to design the buttons.
- Offset the base curves and apply Boolean Difference to carve out button details.
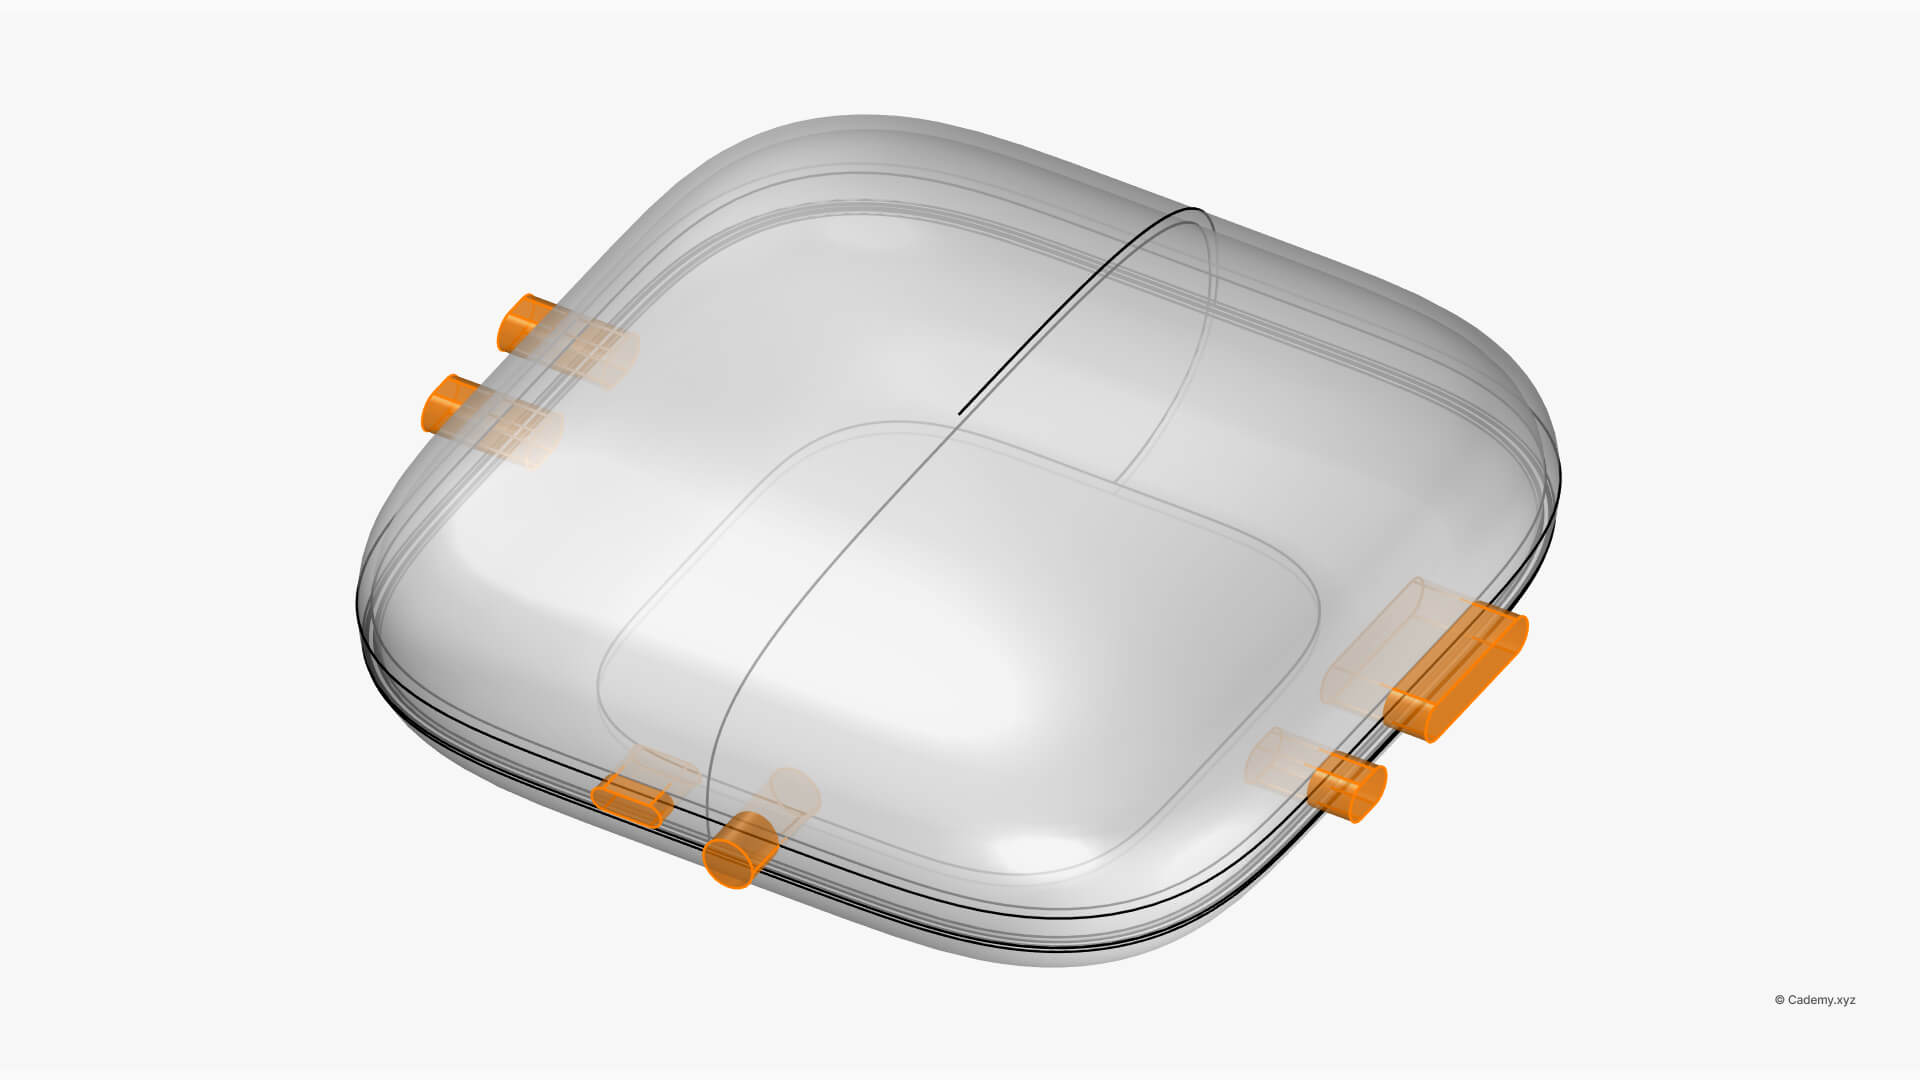
Step 6: Split the Solid
- Divide the speaker into two halves to accommodate internal electronics.
- Add space for USB-C and AUX ports to maintain functionality.
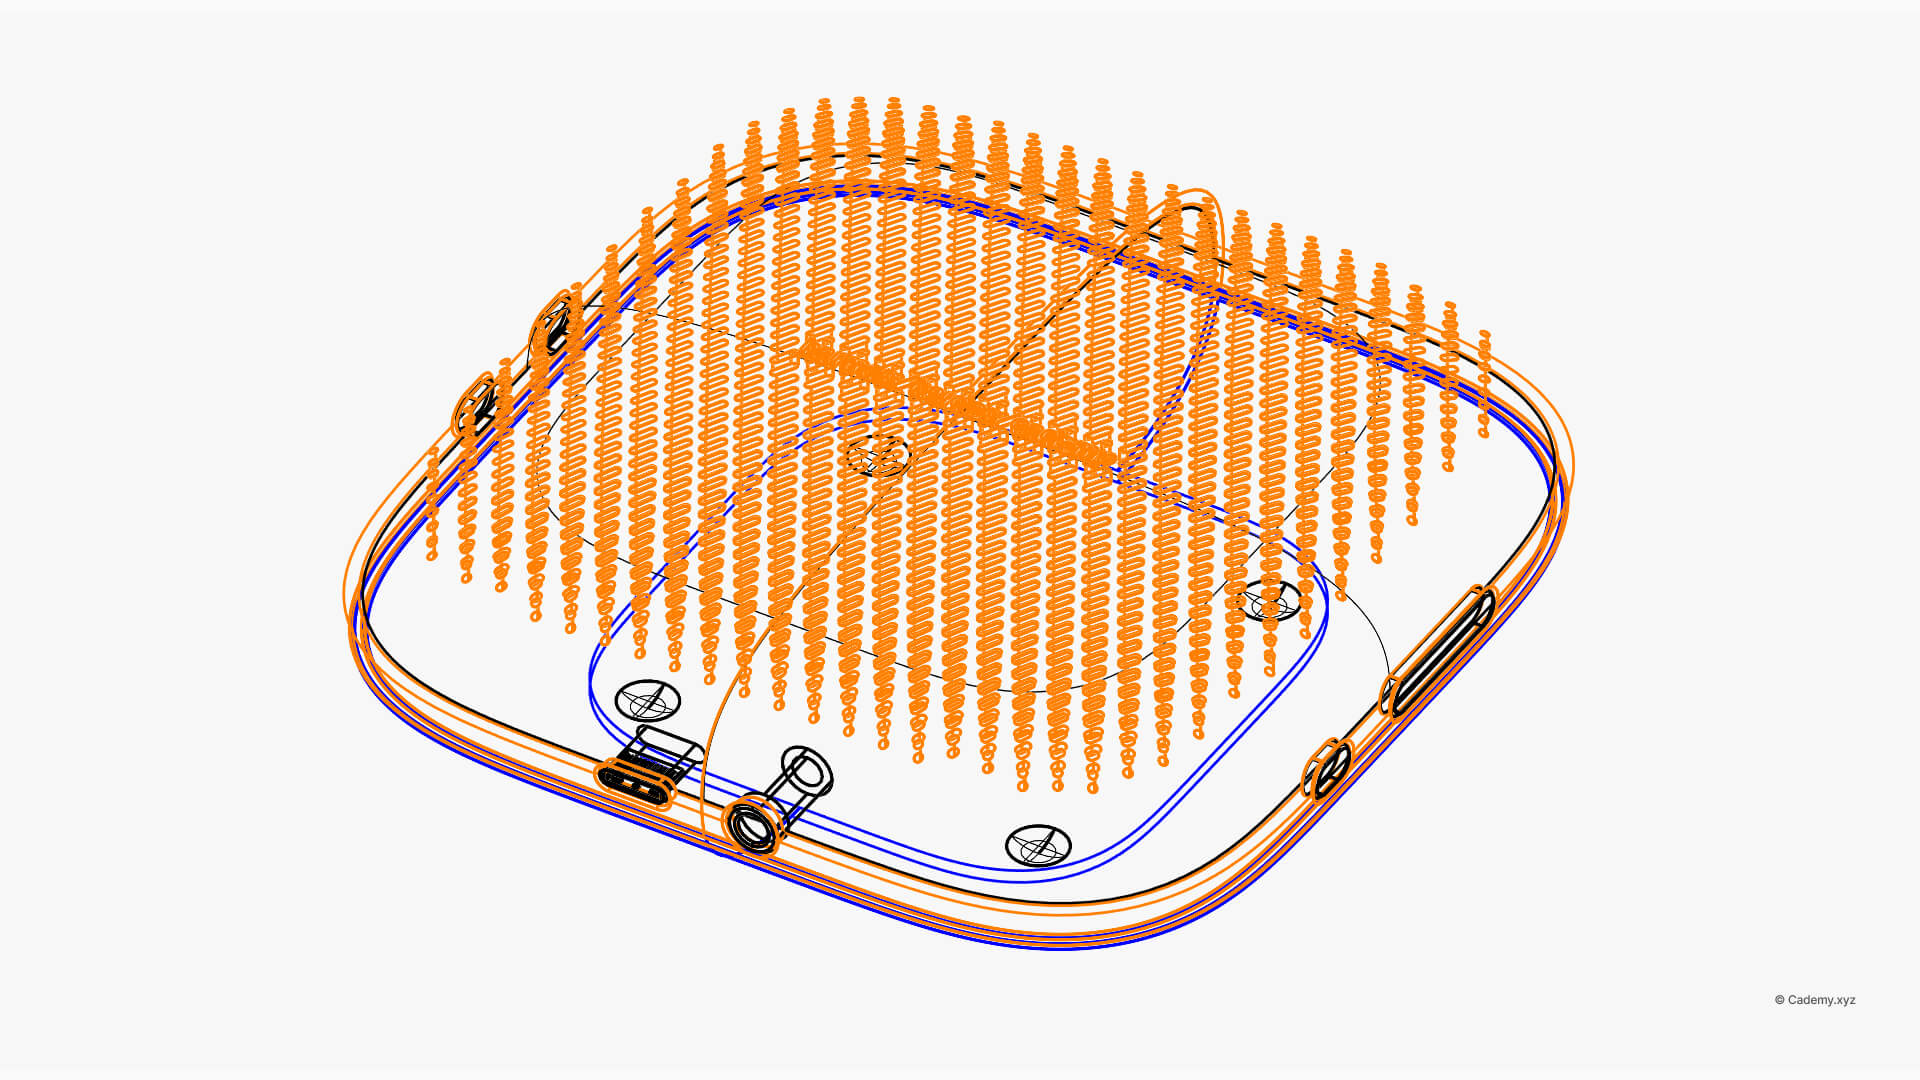
Step 7: Apply Parametric Texture in Grasshopper
- Import the top surface into Grasshopper for parametric design.
- Use intersections and reference planes to define texture placement.
- Create a boundary curve attractor to distort rectangle patterns dynamically.

Step 8: Bake and Boolean
- Bake the extrusions from Grasshopper into Rhino.
- Use Boolean Difference to imprint the acoustic texture onto the surface.

Step 9: Final Assembly
- Combine all elements to create the final model.
- Ensure a clean topology before moving to rendering.
Step 10: Render in KeyShot
- Export the model to KeyShot for final visualization.
- Set up a custom studio using HDRI lighting for a polished, professional look.
Software & Manufacturing
- Software: Rhinoceros 3D, Grasshopper 3D, KeyShot.
- 3D Printing: Export watertight STL files, compatible with SLA + FDM techniques.
Thank you for reading ❤️
